7 Custom Brush Techniques for Terrain Maps That Create Visual Impact
Why it matters: Creating compelling terrain maps requires more than basic tools – you need specialized brush techniques that bring landscapes to life with authentic detail and visual impact.
The big picture: Custom brushes transform flat digital canvases into immersive worlds by mimicking natural textures like rocky outcrops weathered cliffs and flowing water systems that standard tools simply can’t replicate.
What’s next: These seven proven techniques will elevate your cartography skills whether you’re designing fantasy realms for gaming or professional topographical presentations that demand precision and visual appeal.
Disclosure: As an Amazon Associate, this site earns from qualifying purchases. Thank you!
P.S. check out Udemy’s GIS, Mapping & Remote Sensing courses on sale here…
Stippling Technique for Rocky Terrain Textures
Stippling creates convincing rocky terrain by applying dots and small marks that mimic natural stone formations. This technique transforms flat digital surfaces into believable geological features.
Creating Natural Stone Patterns
Randomize your dot placement to avoid mechanical-looking patterns that immediately reveal digital origins. Vary dot sizes between 2-8 pixels and cluster them around natural fracture lines where rocks typically break. Study geological survey photos to understand how weathering creates irregular surface patterns. Group smaller stipples around larger ones to simulate sediment accumulation in rock crevices. This clustering approach replicates how erosion naturally redistributes material across stone surfaces.
Building Depth With Varied Pressure
Apply heavy pressure for recessed areas like cracks and shadow zones where light doesn’t penetrate rock surfaces. Use 80-100% opacity for these deep features while reducing to 30-50% opacity for elevated surfaces catching direct light. Transition between pressure levels gradually to create believable elevation changes across your rocky terrain. Layer multiple stippling passes at different opacities to build complex depth relationships that mirror real geological formations.
Achieving Realistic Surface Roughness
Combine coarse and fine stippling patterns to replicate different rock types and weathering stages. Dense, fine stipples work perfectly for sandstone textures while sparse, bold dots simulate granite surfaces. Adjust your brush hardness between 60-80% to create natural edge variation that hard brushes cannot achieve. Test stippling on separate layers so you can fine-tune roughness intensity without affecting underlying terrain colors or elevation data.
Cross-Hatching Method for Mountain Slopes
Cross-hatching transforms flat mountain surfaces into convincing three-dimensional terrain through strategic line placement and directional control.
Establishing Directional Flow Lines
Create initial stroke patterns that follow your mountain’s natural slope direction. Position parallel lines at 45-degree angles to establish the primary terrain flow, spacing them 3-4 pixels apart for standard resolution maps. Vary line lengths between 8-15 pixels to avoid mechanical repetition while maintaining consistent directional emphasis. Adjust your brush opacity to 60-70% for these foundational strokes, allowing subsequent layers to build naturally upon this directional framework.
Achieve a flawless, even complexion with e.l.f. Flawless Satin Foundation. This lightweight, vegan formula provides medium coverage and a semi-matte finish for all-day wear, while hydrating your skin with glycerin.

Layering Shadows and Highlights
Build shadow depth by adding perpendicular cross-hatching lines at opposing angles to your initial strokes. Concentrate these darker secondary lines in valley areas and cliff bases using 80-90% opacity for maximum contrast. Apply highlight strokes using lighter tones along ridge lines and exposed faces, reducing brush opacity to 30-40% for subtle elevation emphasis. Blend intersecting line areas by varying stroke density rather than pressure.
Creating Elevation Gradients
Establish altitude transitions by gradually reducing cross-hatch density as terrain elevation increases. Space your hatching lines wider apart on higher elevations, creating visual breathing room that suggests atmospheric perspective. Intensify line concentration in lower valley areas using tighter spacing patterns of 1-2 pixels between strokes. Control gradient smoothness by feathering line endpoints and adjusting brush hardness between 70-85% for natural terrain transitions.
Dry Brush Technique for Desert Landscapes
Desert mapping demands texture precision that captures the unique granular surfaces and subtle color shifts found in arid environments. This specialized brush technique creates authentic sandy textures without overwhelming detail.
Mimicking Sand Grain Textures
Apply light, overlapping strokes with minimal paint load to replicate individual sand particles across your terrain map. Use circular motions with a worn brush tip, varying pressure to create natural grain distribution patterns. Focus on irregular clustering where wind deposits accumulate naturally. Adjust your brush opacity between 15-30% for authentic granular appearance. Layer multiple passes with slightly different angles to avoid uniform texture patterns that betray digital creation.
Blending Subtle Color Variations
Transition between warm and cool desert tones using feathered brush movements that mirror natural color gradation. Start with base ochre tones, then introduce burnt sienna in shadowed areas and pale yellow highlights on wind-swept surfaces. Work wet-on-wet when possible to achieve seamless color blending. Keep temperature shifts subtle—desert landscapes feature gentle transitions rather than dramatic color breaks. Use horizontal strokes to suggest wind-carved patterns and directional sand movement.
Adding Weathered Surface Details
Incorporate erosion patterns and wind-carved features by dragging your dry brush across raised texture areas selectively. Focus on ridge edges and exposed surfaces where natural weathering occurs most prominently. Apply darker earth tones in protected crevices using stippling motions combined with light dragging strokes. Create realistic wind scour marks by pulling your brush in consistent directional patterns. Vary stroke intensity to suggest different weathering stages across your desert terrain features.
Sponge Dabbing for Forest Canopy Representation
Sponge dabbing transforms digital forest areas from flat green spaces into convincing three-dimensional canopies. This technique uses natural sponge textures to replicate the irregular, organic appearance of overlapping tree crowns and foliage masses.
Simulating Tree Cluster Density
Vary your dabbing pressure to create realistic forest density patterns across your terrain map. Light touches produce sparse woodland areas while heavier pressure generates dense canopy coverage. Apply multiple dabs in circular motions to build natural tree groupings, leaving irregular gaps between clusters to simulate clearings and forest paths. Concentrate denser applications along ridgelines and valley bottoms where trees naturally congregate, creating believable forest distribution patterns that follow topographical logic.
Creating Organic Edge Variations
Rotate your sponge at different angles with each application to avoid repetitive edge patterns along forest boundaries. This rotation technique prevents mechanical-looking borders that immediately reveal digital construction. Blend forest edges into grasslands and clearings using progressively lighter dabs, creating natural transition zones rather than hard lines. Vary the sponge size throughout the edge-building process, using smaller pieces for detailed work around rocky outcrops and larger sections for sweeping forest margins.
Layering Multiple Green Tones
Build depth through strategic color layering starting with darker base greens and gradually adding lighter canopy highlights. Apply your darkest forest tones first to establish shadow areas beneath the canopy, then layer medium greens for the main foliage mass. Finish with light yellow-green highlights dabbed sparingly on canopy tops to simulate sunlight filtering through leaves. This three-tone approach creates convincing forest depth while maintaining the organic texture that sponge dabbing provides across your terrain representation.
Palette Knife Scraping for Cliff Faces
This 5-piece palette knife set offers diverse stainless steel blades for applying, shaping, and mixing paint. Ergonomic wood handles provide comfort and control for various painting techniques and media.

Palette knife scraping transforms flat surfaces into convincing vertical rock formations by mimicking the sharp, angular cuts found in natural cliff faces. This technique creates the dramatic contrast between light and shadow that gives cliff faces their imposing three-dimensional appearance.
Carving Sharp Vertical Edges
Hold your palette knife at a 45-degree angle and drag it downward through wet paint to create clean vertical lines that simulate cliff stratification. Apply firm pressure at the top of each stroke and gradually lighten as you move downward to replicate natural weathering patterns. Vary the knife’s edge position between strokes to create irregular cliff faces rather than perfectly uniform surfaces. Remove excess paint from your knife between strokes to maintain crisp edge definition throughout your cliff mapping process.
Building Dramatic Light Contrasts
Create stark shadow pockets by scraping away paint completely in recessed areas while leaving thick paint deposits on protruding cliff sections. Use the flat side of your palette knife to spread highlights across exposed rock faces that would catch direct sunlight. Layer darker base colors first then scrape through to reveal lighter undertones that simulate reflected light bouncing off canyon walls. This contrast technique produces the depth perception essential for accurate cliff face representation.
Adding Geological Fracture Lines
Score horizontal fracture lines across your cliff faces using the knife’s sharp edge to represent natural rock layering and sedimentary deposits. Create diagonal stress fractures by dragging the knife at varying angles through your paint layers to show geological fault patterns. Intersect these fracture lines at different points to build realistic rock formation complexity that mirrors actual cliff geology. Fill some fractures with darker paint while leaving others as exposed lighter areas to show weathering variation.
Splatter Technique for Wetland Areas
The splatter technique transforms your wetland mapping by creating organic moisture patterns that standard brushes can’t achieve. This method uses controlled paint dispersal to simulate the complex textures found in marshes, swamps, and boggy terrain.
Creating Natural Water Droplet Patterns
Load your brush with diluted paint and flick it against a palette knife held 6-8 inches above your canvas. Vary droplet sizes by adjusting the paint consistency—thicker paint creates larger splatters while watery mixtures produce fine mist effects. Control the splatter direction by angling your knife toward areas where water naturally pools. Layer multiple splatter passes using blues and greens to build authentic water surface textures that mirror real wetland conditions.
Suggesting Marsh Vegetation Density
Apply dense splatter clusters in irregular patches to represent thick reed beds and cattail stands. Space your splatters more widely in transition zones where vegetation gradually thins toward open water. Use darker green paint mixtures for the initial splatter layer, then add lighter yellow-green accents to suggest new growth. Concentrate heavier splatter applications along shorelines and elevated areas where marsh plants typically establish their strongest colonies.
Building Atmospheric Moisture Effects
Create hazy atmospheric layers by splashing very diluted paint from greater distances above your work surface. Build humidity effects through multiple light applications rather than single heavy splatters. Blend splatter edges while the paint remains wet to simulate the soft transitions characteristic of moisture-laden air. Graduate your splatter density from heavy near water sources to lighter applications in surrounding dry areas, mimicking natural humidity gradients in wetland environments.
Glazing Method for Water Body Reflections
The glazing method transforms flat water features into convincing reflective surfaces through transparent color layering. This technique builds realistic water depth while maintaining the luminous quality essential for believable cartographic water bodies.
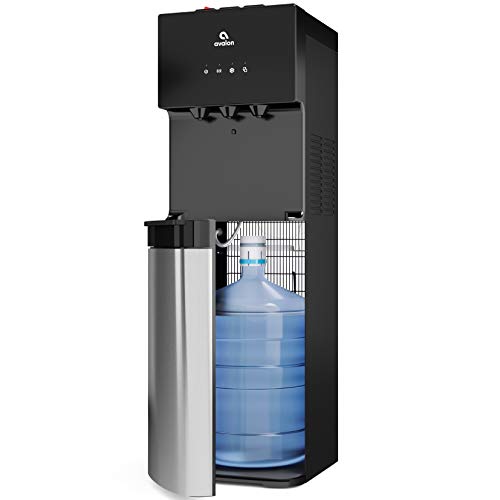
Enjoy refreshing water with the Avalon Bottom Loading Water Cooler. It offers hot, cold, and room temperature options, a BioGuard anti-microbial coating, and a child safety lock for peace of mind.
Achieving Transparent Water Surfaces
Apply thin, diluted paint layers to create convincing water transparency that mimics natural aquatic environments. Mix your base water color with glazing medium at a 1:3 ratio to achieve optimal translucency. Work quickly while the glaze remains workable, typically 5-7 minutes depending on humidity. Layer multiple transparent coats rather than attempting full coverage in single applications. Each successive layer should be slightly cooler in temperature to simulate increasing water depth.
Create luminous acrylic glazes with Liquitex Glazing Medium. This non-yellowing, water-resistant medium enhances color brilliance and offers excellent leveling for smooth application.

Creating Depth Illusions
Build visual depth through strategic color temperature shifts from warm shallows to cool depths. Start with warmer blues near shorelines and gradually transition to cooler, darker tones toward the center. Apply your darkest glazes along the deepest channel areas where sediment naturally settles. Use vertical brushstrokes in deeper sections to suggest downward water movement. Blend each glaze layer while wet to avoid harsh transition lines that break the depth illusion.
Capturing Light Reflections
Create realistic light reflections by scraping highlights through wet glaze using a clean, dry brush or palette knife edge. Work from light source direction, typically northwest in standard cartographic convention. Leave subtle vertical streaks of lighter color to represent surface light scatter. Apply reflective highlights sparingly—overworking destroys the glassy water surface effect. Add final sparkle details with pure white applied via stippling technique after glazes fully dry.
Conclusion
These seven custom brush techniques will transform your terrain mapping from basic sketches into professional-quality cartographic art. You’ll find that mastering stippling rocky textures cross-hatching mountain slopes and dry brushing desert sands creates the foundation for compelling landscapes.
The advanced techniques of sponge dabbing forests palette knife cliff scraping and splatter wetlands add authentic environmental details that captivate viewers. Meanwhile glazing water reflections brings that final touch of realism that separates amateur maps from professional presentations.
Practice each technique individually before combining them in complex terrain compositions. Your patience with these methods will reward you with maps that truly capture the natural world’s intricate beauty and geological diversity.
Frequently Asked Questions
What makes specialized brush techniques essential for terrain mapping?
Specialized brush techniques allow cartographers to create realistic textures that standard tools cannot achieve. Custom brushes accurately mimic natural formations like rocky surfaces, sand grains, and forest canopies, transforming flat digital canvases into visually impactful terrain maps suitable for both fantasy gaming and professional topographical presentations.
Explore and map the wilderness for the Queen in Cartographers! Draw unique terrain shapes and score points based on randomly selected goals each game, but beware of monster ambushes.

How does the stippling technique create realistic rocky terrain?
Stippling uses dots and small marks to mimic natural stone formations. Key elements include randomizing dot placement, varying dot sizes, and clustering smaller stipples around larger ones to simulate sediment accumulation. Building depth through varied pressure and different opacities helps represent recessed areas and elevated surfaces effectively.
What is the cross-hatching method for depicting mountain slopes?
Cross-hatching creates mountain slopes by establishing directional flow lines and layering shadows and highlights to build depth. This technique involves adjusting line density and spacing to create elevation gradients, making flat terrain appear three-dimensional with realistic slope variations and natural mountain contours.
How does dry brush technique work for desert landscapes?
The dry brush technique captures the unique granular surfaces of arid environments through texture precision. It mimics sand grain textures and blends subtle color variations to achieve seamless transitions, creating authentic desert landscapes that showcase the distinctive characteristics of sandy, windswept terrain.
What is sponge dabbing and how does it represent forest canopies?
Sponge dabbing transforms flat green spaces into three-dimensional forest representations. The technique involves varying dabbing pressure to simulate tree cluster density, applying circular motions, and rotating the sponge for organic edge variations. Layering multiple green tones from dark bases to light highlights creates realistic depth.
How does palette knife scraping create realistic cliff faces?
Palette knife scraping mimics sharp, angular cuts in natural rock formations. Hold the knife at a 45-degree angle and drag downward through wet paint to carve vertical edges. This technique builds dramatic light contrasts and adds geological fracture lines representing natural rock layering and sedimentary deposits.
What is the splatter technique for wetland mapping?
The splatter technique creates organic moisture patterns in marshes and swamps through controlled paint dispersal. It involves flicking diluted paint from a palette knife to create natural water droplet patterns, varying droplet sizes, and layering splatters to build authentic water surface textures and marsh vegetation density.
How does the glazing method enhance water body reflections?
Glazing uses transparent color layering to create convincing reflective water surfaces. Apply thin, diluted paint layers mixed with glazing medium to achieve water transparency. Strategic color temperature shifts create depth illusions, while scraping highlights through wet glaze captures realistic light reflections on water bodies.