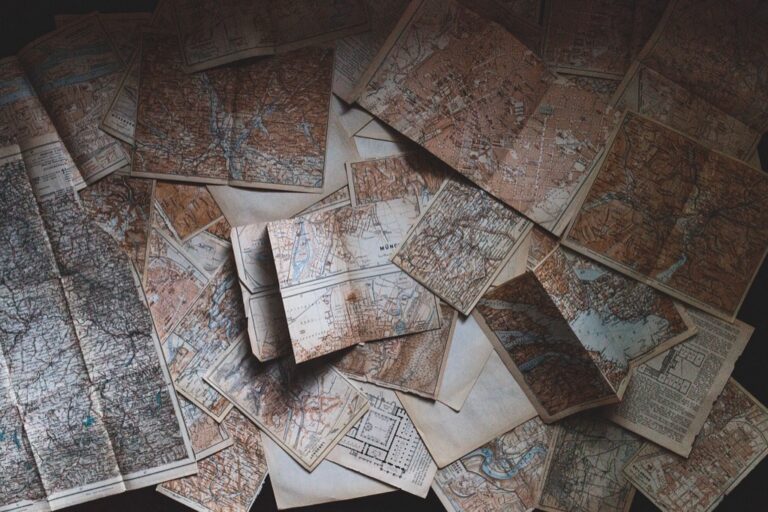
7 Best Map Lamination Techniques
Maps deserve better than basic plastic sleeves. Whether you’re preserving vintage cartography or protecting daily-use navigation tools, standard lamination often falls short of your needs.
Creative lamination techniques transform ordinary maps into durable, functional, and visually striking pieces. From weather-resistant outdoor applications to elegant display formats, these seven innovative approaches will revolutionize how you protect and present your cartographic collection.
Disclosure: As an Amazon Associate, this site earns from qualifying purchases. Thank you!
Standard Hot Lamination for Basic Map Protection
Hot lamination provides the most reliable foundation for protecting your cartographic investments from moisture, tears, and daily handling wear.
P.S. check out Udemy’s GIS, Mapping & Remote Sensing courses on sale here…
Achieve a flawless, even complexion with e.l.f. Flawless Satin Foundation. This lightweight, vegan formula provides medium coverage and a semi-matte finish for all-day wear, while hydrating your skin with glycerin.

Choosing the Right Lamination Thickness
Select 3-mil lamination for lightweight maps like topographic sheets and street guides that you’ll fold frequently. This thickness maintains flexibility while providing adequate moisture protection for field use.
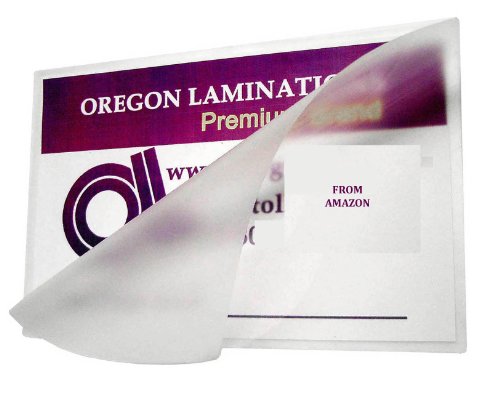
Protect your documents and photos with these durable 3 mil laminating sheets. The clear, tear-resistant pouches are compatible with thermal laminators and provide a water-resistant barrier for items up to 8.5" x 11".

Choose 5-mil lamination for reference maps and wall-mounted displays that require moderate durability. The extra thickness prevents creasing during mounting and provides better UV resistance for maps exposed to sunlight.
Protect documents and add a professional finish with these 5 mil Scotch Thermal Laminating Pouches. This 100-count pack fits letter-size items up to 8.9" x 11.4" and creates durable, marker-proof, tear-proof, and spill-proof results.

Use 7-mil or 10-mil lamination for high-traffic maps in educational settings or outdoor recreation areas. These heavy-duty options withstand repeated handling and resist punctures from pencils and marking tools.
Protect your documents with these durable 10 mil laminating pouches. This pack of 100 clear, heat-activated pouches creates a sealed border and features pre-rounded corners for a professional finish.
Temperature and Speed Settings for Optimal Results
Set your laminator to 275-300°F for standard polyethylene pouches to ensure complete adhesive activation without map distortion. Test temperature settings on sample materials before processing valuable originals.
Adjust speed to 2-3 feet per minute for detailed topographic maps with fine contour lines and text. Slower speeds prevent air bubbles and ensure even heat distribution across complex cartographic elements.
Learn essential map reading and navigation skills with this U.S. Army guide. Designed for practical use, it provides clear instructions for navigating any terrain.

Monitor carrier sheet condition regularly as worn carriers can create uneven pressure distribution. Replace carriers every 50-75 lamination cycles to maintain consistent results across your map collection.
Cold Lamination for Heat-Sensitive Maps
Cold lamination protects delicate historical maps and heat-sensitive materials without thermal damage. You’ll preserve antique documents and modern synthetic maps using pressure-activated adhesives instead of heat.
Explore history's most significant maps with *Great Maps*. This book delves into cartographic masterpieces and their historical context.

Benefits of Pressure-Sensitive Adhesive Films
Pressure-sensitive films eliminate thermal stress that can warp vintage paper maps or damage temperature-sensitive inks. You’ll maintain original colors and prevent paper shrinkage common with hot lamination. These films provide UV protection while allowing easy repositioning during application. You can laminate photographs, watercolor maps, and thermographic prints safely. The adhesive activates through pressure alone, creating durable bonds without heat-related distortion.
Step-by-Step Cold Lamination Process
Clean your workspace and remove dust particles from the map surface using a soft brush. Position the map face-down on the adhesive side of the film, starting from one edge. Use a squeegee or roller to apply even pressure, working from center outward to eliminate air bubbles. Trim excess film leaving a quarter-inch border around map edges. You’ll achieve professional results by maintaining consistent pressure and working slowly to prevent wrinkles or adhesive pockets.
Textured Lamination for Enhanced Grip and Durability
Textured lamination surfaces provide superior handling characteristics for maps used in challenging outdoor conditions. You’ll find these specialized films offer both functional benefits and enhanced durability compared to standard smooth finishes.
Anti-Slip Surface Options for Outdoor Use
Orange peel texture lamination creates microscopic bumps that improve grip when your hands are wet or gloved. This finish works exceptionally well for topographic maps used in hiking or mountaineering applications. Linen texture films provide a fabric-like surface that’s ideal for field reference maps, offering excellent grip even in humid conditions. You can also choose sand-grain textures for maximum slip resistance, though these work best with larger format maps where the texture won’t interfere with fine detail reading.
Matte Finish Alternatives to Reduce Glare
Non-glare matte lamination eliminates reflective hotspots that make maps difficult to read under bright sunlight or artificial lighting. You’ll appreciate how this finish reduces eye strain during extended map reading sessions while maintaining excellent image clarity. Satin finish films offer a compromise between glare reduction and surface durability, making them perfect for maps that need frequent handling. These textures also hide fingerprints and smudges better than glossy alternatives, keeping your maps looking professional longer.
Magnetic Lamination for Interactive Map Displays
Magnetic lamination transforms static maps into interactive tools that can be repositioned on metal surfaces. This technique allows field teams to work with detachable maps on vehicles, whiteboards, or planning boards without permanent mounting hardware.
Adding Magnetic Backing During Lamination
Magnetic sheet adhesion creates functional displays that stick to steel surfaces without additional fasteners. You’ll apply magnetic vinyl backing material during the standard lamination process, creating a flexible map that maintains its magnetic properties through multiple uses. Choose flexible magnetic material rated at 30-50 mil thickness for optimal holding strength while preserving map readability and handling characteristics.
Creative Uses for Magnetic Laminated Maps
Planning room displays benefit from magnetic maps that team members can move between project boards and update locations dynamically. You can create modular mapping systems where topographic sections attach to vehicle dashboards for navigation or planning walls for mission coordination. Emergency response teams particularly value magnetic laminated maps that transfer quickly between command vehicles and incident command boards during deployment changes.
UV-Resistant Lamination for Outdoor Exposure
Extended outdoor exposure requires specialized protection beyond standard lamination methods. UV-resistant films prevent the gradual degradation that ruins valuable maps over time.
Protecting Maps from Sun Damage and Fading
Ultraviolet radiation breaks down paper fibers and degrades ink pigments within months of regular sunlight exposure. You’ll notice yellowing edges first, followed by brittle paper that cracks along fold lines. Topographic contour lines fade to illegible gray within six months without protection. UV-resistant lamination blocks 99.5% of harmful rays while maintaining optical clarity. Your maps retain original colors and paper flexibility for years instead of deteriorating within seasons.
Selecting UV-Blocking Lamination Films
Premium UV-blocking films contain specialized additives that absorb ultraviolet wavelengths between 280-400 nanometers. You’ll find polyester-based films with UV inhibitors offer superior performance compared to standard polyethylene options. Look for films rated at 99% UV protection or higher from manufacturers like 3M or Fellowes. Thickness matters: 5-mil UV films provide adequate protection for occasional outdoor use, while 10-mil films handle constant exposure. Clear UV films maintain transparency, while slight amber tinting indicates active UV-blocking compounds.
Waterproof Lamination Techniques for Marine and Hiking Maps
Marine environments and backcountry hiking demand absolute moisture protection for your navigation tools. Standard lamination alone won’t survive saltwater spray or sustained rainfall exposure.
Complete Seal Methods for Maximum Protection
Complete seal methods create an impermeable barrier around your entire map using specialized waterproof films. You’ll need to use 10-mil polyester films with marine-grade adhesive that bonds completely to prevent moisture infiltration. Professional heat sealers operating at 275-300°F ensure proper edge fusion, while vacuum-chamber lamination removes air pockets that could compromise the seal. Test sealed edges by submerging samples in water for 24 hours before field deployment.
Edge Sealing Tips for Water-Resistant Results
Edge sealing tips focus on creating watertight perimeters using marine-grade sealants and proper trimming techniques. Trim laminated edges to leave 1/8-inch borders, then apply waterproof edge tape rated for outdoor use. Heat-activated edge sealers work best for polyester films, requiring 250°F temperatures and 3-second dwell times. Double-check corner seals where water typically penetrates first, and consider rounded corners to reduce stress points that could crack under field conditions.
Creative Dry Erase Lamination for Reusable Planning Maps
Dry erase lamination transforms your static maps into dynamic planning tools that you can mark, modify, and reuse countless times. This technique creates professional-grade surfaces that withstand frequent writing and erasing while maintaining map clarity.
Choosing Write-On, Wipe-Off Lamination Films
You’ll need specialized dry erase films with smooth, glossy surfaces that resist marker absorption. Polypropylene-based films at 5-7 mil thickness provide optimal writing performance without ghosting. Avoid textured laminates that trap ink residue.
Premium dry erase films feature:
- Anti-static properties that prevent dust accumulation
- Chemical-resistant coatings that handle alcohol-based cleaners
- High-gloss finishes that ensure smooth marker flow
- Pressure-sensitive adhesives that eliminate bubble formation
Maintenance Tips for Long-Lasting Dry Erase Surfaces
You’ll extend your dry erase map’s lifespan by cleaning with isopropyl alcohol after each use. Microfiber cloths remove marker residue without scratching the laminated surface. Store maps flat or rolled loosely to prevent cracking.
- Using only dry erase markers designed for laminated surfaces
- Avoiding permanent markers that can penetrate the film coating
- Cleaning stubborn stains with specialized whiteboard cleaners
- Replacing worn films when ghosting becomes noticeable during planning sessions
Conclusion
These seven lamination techniques give you the power to transform any map into a durable professional tool that matches your specific needs. Whether you’re preserving historical documents with cold lamination or creating interactive planning surfaces with dry erase films you now have options that go far beyond basic plastic sleeves.
Your choice of technique depends on how you’ll use your maps. Outdoor enthusiasts benefit from waterproof and UV-resistant options while office planners might prefer magnetic or textured surfaces. Each method offers unique advantages that can extend your maps’ lifespan by years.
The investment in proper lamination pays dividends through reduced replacement costs and improved functionality. Your maps become more than static references—they become versatile tools that adapt to changing requirements while maintaining their integrity in challenging conditions.
Frequently Asked Questions
What thickness of lamination should I use for different types of maps?
For lightweight maps, use 3-mil lamination. Reference maps work best with 5-mil thickness, while high-traffic maps need 7-mil or 10-mil lamination for maximum durability. The thicker the lamination, the better protection it provides against wear and tear.
When should I use cold lamination instead of hot lamination?
Cold lamination is ideal for delicate historical maps and heat-sensitive materials that could be damaged by thermal processes. It uses pressure-sensitive adhesive films that eliminate thermal stress while maintaining original colors and providing UV protection.
What are the benefits of textured lamination for outdoor maps?
Textured lamination improves grip and durability for challenging outdoor conditions. Orange peel texture works well for wet or gloved hands, linen texture provides a fabric-like surface, and sand-grain textures offer maximum slip resistance for larger format maps.
How does magnetic lamination work and what are its uses?
Magnetic lamination adds a flexible magnetic backing to maps, allowing them to be repositioned on metal surfaces like vehicles or whiteboards. It’s particularly useful for emergency response teams and field operations requiring portable, interactive mapping solutions.
Why is UV-resistant lamination important for outdoor maps?
UV radiation degrades paper fibers and ink pigments, causing yellowing, brittleness, and fading. UV-resistant films block 99.5% of harmful rays, preserving original colors and flexibility. Use 5-mil for occasional outdoor use and 10-mil for constant exposure.
What makes waterproof lamination different from standard lamination?
Waterproof lamination creates an impermeable barrier using specialized films and marine-grade adhesives. It requires professional heat sealers or vacuum-chamber lamination, plus proper edge sealing techniques to ensure complete moisture protection for marine and hiking maps.
How do dry erase laminated maps work?
Dry erase lamination transforms static maps into reusable planning tools using specialized films with smooth, glossy surfaces that resist marker absorption. These polypropylene-based films (5-7 mil thickness) feature anti-static properties and chemical resistance for repeated use.
What temperature settings should I use for hot lamination?
Temperature settings vary by equipment and film type, but generally range from 250-300°F. Always test on sample materials first and monitor your equipment closely. Start with lower temperatures and adjust upward as needed to achieve proper adhesion without damaging the map.