7 Best Map Making Materials for Tactile Art
Traditional paper maps have given way to digital alternatives, but there’s something uniquely powerful about creating physical maps with your own hands. You’re not limited to standard materials like cardboard and markers – innovative map-making opens doors to textures, dimensions, and interactive elements that bring geography to life in unexpected ways.
Whether you’re an educator looking to engage students, an artist exploring cartographic expression, or simply someone who loves hands-on projects, experimenting with unconventional materials transforms map-making from a basic exercise into a creative adventure. From edible landscapes to textile territories, these seven experimental approaches will revolutionize how you think about representing space and place.
Disclosure: As an Amazon Associate, this site earns from qualifying purchases. Thank you!
Salt Dough Topographic Maps
Create unique clay projects with this 5lb bucket of Crayola Air Dry Clay. This natural, nontoxic clay is easy to sculpt and paint, perfect for classrooms and kids ages 3+.

Salt dough provides an affordable, moldable medium that transforms flat geographic data into three-dimensional terrain models. You’ll create tactile maps that showcase elevation changes through hands-on sculpting techniques.
P.S. check out Udemy’s GIS, Mapping & Remote Sensing courses on sale here…
Creating Elevation With Kitchen Ingredients
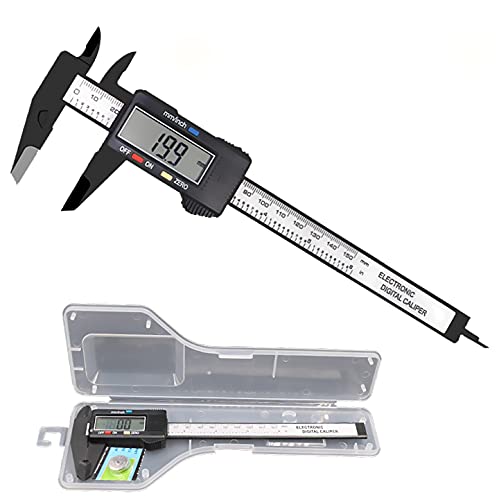
Mix two cups flour, one cup salt, and three-quarters cup water to create your base dough for topographic modeling. You’ll knead the mixture until smooth, then section portions for different elevation zones across your map area. Add water gradually while working higher elevations to maintain workability, and use measuring tools to ensure consistent scale ratios. Press and mold each elevation layer systematically, building from lowest valleys to highest peaks while referencing contour interval data from your source maps.
Get precise measurements with this digital caliper, featuring easy inch/millimeter conversion and a clear LCD display. Measure inner/outer diameters, depths, and steps with accuracy, plus enjoy automatic shutoff for extended battery life.
Painting and Texturing Techniques for Realistic Terrain
Apply acrylic paints in elevation-based color schemes using browns for lowlands, greens for mid-elevations, and whites for mountain peaks. You’ll create realistic surface textures by stippling paint with natural sponges for forest coverage and dragging brushstrokes for water features. Blend colors while wet to achieve smooth elevation transitions, and add fine sand or coffee grounds to paint for additional surface texture. Seal finished maps with clear acrylic coating to preserve both color vibrancy and structural integrity during handling.
Foam Board Layered Relief Maps
Lightweight yet rigid foam boards are perfect for crafts, displays, and school projects. The 3/16" thickness is easy to cut and handle.

Foam board layered relief maps offer precision and durability that traditional paper maps can’t match. You’ll create stunning three-dimensional representations by strategically cutting and stacking foam layers to represent elevation changes.
Cutting and Stacking Techniques for Depth
Start with 1/4-inch foam board sheets and transfer your contour lines using a projector or grid method. Use a sharp craft knife or hot wire foam cutter to maintain clean edges along elevation boundaries. Stack layers from lowest to highest elevation, securing each with spray adhesive or double-sided tape. Create dramatic depth by varying foam thickness – use 1/8-inch for subtle elevation changes and 1/2-inch for major terrain features like mountain ranges.
Adding Color and Detail to Foam Layers
Apply acrylic paint directly to foam surfaces using elevation-based color schemes – blues for water bodies, greens for lowlands, and browns for higher elevations. Use dry brushing techniques to create realistic texture on mountain peaks and valleys. Add geographic details with fine-tip markers for roads, boundaries, and labels. Finish with a matte acrylic sealer to protect your work and prevent paint from chipping during handling or display.
Papier-Mâché Sculptural Geography
Papier-mâché transforms flat geographic data into sculptural masterpieces that capture terrain’s dramatic essence. This malleable medium lets you build complex topography with remarkable detail and artistic flair.
Building Mountain Ranges and Valleys
Create your base structure using crumpled newspaper or cardboard forms shaped to match elevation contours. Apply papier-mâché strips in thin layers, building up mountain peaks gradually while carving valleys between ridges. Use smaller torn pieces for fine details like rocky outcrops and cliff faces. Allow each layer to dry completely before adding the next to prevent cracking and ensure structural integrity.
Incorporating Rivers and Water Features
Carve river channels into your papier-mâché surface while the material remains slightly damp for easier shaping. Press meandering pathways using clay tools or your fingers, following natural watershed patterns from highlands to lowlands. Paint water features with glossy blue acrylic paint mixed with gel medium for realistic depth. Add small pebbles or sand texture around riverbanks to simulate natural sediment deposits and shoreline details.
Recycled Cardboard Contour Maps
Transform discarded cardboard into detailed elevation models that rival expensive commercial relief maps. This sustainable approach lets you create precise topographic representations while reducing waste and cutting material costs significantly.
Using Shipping Boxes for Large-Scale Projects
These medium-sized moving boxes are ideal for packing, shipping, and storing various household items. Each box holds up to 65 lbs and is made from durable, recyclable corrugated cardboard.

Large shipping boxes provide the foundation for classroom-sized relief maps spanning multiple square feet. You’ll cut individual contour layers from flattened box surfaces, creating elevation intervals of 50-100 feet depending on your terrain’s complexity. Stack corrugated layers with spray adhesive for permanent bonding, then trim edges with craft knives for clean profiles. This method works exceptionally well for mountain ranges and canyon systems where dramatic elevation changes demand substantial material thickness.
Sustainable Mapping Solutions
Cardboard mapping diverts packaging waste from landfills while delivering professional-quality results at minimal cost. You can source materials from appliance stores, moving companies, and online retailers who regularly discard large boxes. Single-wall cardboard handles gentle terrain features, while double-wall versions support steep mountain profiles and heavy paint applications. Seal finished maps with acrylic medium to prevent moisture damage and extend display life beyond five years.
Sand and Plaster Textured Landscapes
Sand and plaster combinations create incredibly realistic terrain surfaces that capture the authentic feel of natural landscapes. You’ll achieve professional-quality results that surpass traditional paper methods by mastering these mixing and texturing techniques.
Mixing Ratios for Optimal Consistency
Perfect plaster consistency requires a 3:1 sand-to-plaster ratio for most terrain features. Fine-grain sand works best for detailed areas like riverbeds and coastal regions. Coarse sand creates dramatic mountain textures and rocky outcrops. Add water gradually until you achieve a peanut butter-like consistency that holds shape without cracking. Test small batches first to avoid waste during large-scale projects.
Creating Natural-Looking Surface Textures
Surface texturing transforms basic plaster into convincing geographic features through strategic tool application. Use palette knives to carve river channels and valleys while the mixture remains workable. Press natural sponges into wet surfaces to simulate rock formations and cliff faces. Drag combs through the material to create sedimentary layers and geological striations that enhance topographic accuracy.
Fabric and Felt Soft Maps
Fabric and felt materials transform rigid cartography into tactile experiences that invite exploration through touch. These soft mapping materials excel in educational settings where students benefit from hands-on geographic learning.
Choosing Materials for Different Geographic Features
Cotton canvas works best for large land masses like continents and countries because its sturdy weave holds shape while remaining flexible. Felt sheets in earth tones represent different elevations effectively – brown for mountains, green for plains, and blue for water bodies. Corduroy fabric creates realistic mountain textures through its raised ridges, while smooth satin perfectly mimics water surfaces. Burlap adds authentic desert textures, and velvet provides rich forest representations that students can actually feel.
Stitching Techniques for Boundary Lines
Running stitches mark political boundaries clearly using contrasting thread colors that stand out against fabric backgrounds. Backstitch creates permanent state and country borders that won’t unravel with handling. Chain stitch works perfectly for rivers and coastlines because it follows curved paths naturally. French knots indicate cities and capitals with raised texture that students can locate by touch. Blanket stitch secures fabric edges while creating decorative coastal borders that resemble waves.
LED-Integrated Interactive Maps
LED-integrated interactive maps transform static geographical displays into dynamic educational tools that respond to user interaction. You’ll create stunning visual effects by strategically placing programmable LED strips beneath translucent materials.
Wiring Systems for City and Landmark Highlights
Wire your LED systems using copper tape circuits for precise city and landmark positioning on your interactive maps. Connect individual LEDs to Arduino microcontrollers for programmable lighting sequences that highlight specific geographic features. Use 5V LED strips with adhesive backing for easy installation beneath translucent materials like vellum or thin acrylic sheets. Employ momentary push-button switches positioned at map edges to trigger location-specific lighting displays. Solder connections require basic electronics skills but deliver professional results that transform static geography into engaging interactive experiences.
Battery Power Solutions for Portable Displays
Power your LED mapping displays with rechargeable lithium-ion battery packs rated at 7.4V for optimal portability and extended operation time. USB power banks provide convenient charging solutions and typically run LED strip installations for 6-8 hours of continuous use. Install voltage regulators to prevent LED burnout when using higher-capacity batteries in your portable mapping systems. Consider solar panel integration for outdoor educational displays that operate independently of grid power. Battery-powered systems enable classroom presentations and field demonstrations without proximity constraints to electrical outlets.
Conclusion
These seven experimental materials offer you endless possibilities to transform ordinary geography lessons into extraordinary learning experiences. You’ll discover that each approach brings its own unique advantages whether you’re seeking durability cost-effectiveness or interactive features.
Your choice of materials will depend on your specific needs and skill level. Salt dough and papier-mâché work perfectly for beginners while LED integration challenges more advanced creators. Fabric maps excel in educational settings where tactile learning matters most.
The beauty of experimental map-making lies in combining techniques. You might start with a foam board base add LED lighting and finish with fabric details. This creative flexibility lets you craft truly personalized geographic representations.
Remember that the journey matters as much as the destination. Each material teaches different skills from basic sculpting to electronics integration expanding your creative toolkit for future projects.
Frequently Asked Questions
What are the main benefits of creating physical maps by hand instead of using digital alternatives?
Hand-made physical maps offer unique creative potential through unconventional materials, adding textures, dimensions, and interactive elements that digital maps cannot provide. They transform simple map-making into a creative adventure, appealing to educators, artists, and hobbyists who want a more engaging and tactile geographic representation experience.
What materials do I need to make salt dough topographic maps?
You’ll need basic ingredients for salt dough (flour, salt, and water), sculpting tools for shaping terrain, and painting supplies for realistic coloring and texturing. The process involves mixing the dough, sculpting elevation changes to represent geographic data, and applying paint techniques to create authentic-looking terrain features.
How do foam board layered relief maps differ from other map-making methods?
Foam board layered relief maps offer superior precision and durability compared to other methods. They involve cutting and stacking foam layers to create depth, then using acrylic paint for detailed coloring. This technique provides clean, professional-looking results that can withstand handling better than softer materials.
Can I use recycled materials for map-making projects?
Yes, recycled cardboard contour maps are an excellent sustainable option. This method transforms discarded cardboard into detailed elevation models, emphasizing both cost-effectiveness and environmental responsibility. It’s perfect for educational settings where budget and sustainability are important considerations.
What makes fabric and felt maps special for educational use?
Fabric and felt soft maps provide exceptional tactile experiences, making them ideal for educational settings. They use specific stitching techniques to represent geographic features, allowing students to physically explore terrain through touch. This hands-on approach enhances learning, especially for visual and kinesthetic learners.
How do LED-integrated interactive maps work?
LED-integrated maps use copper tape circuits and Arduino microcontrollers to create programmable lighting sequences that highlight geographic features. These systems transform static displays into dynamic educational tools, making geography lessons more engaging and interactive through customizable lighting patterns and effects.
What power options are available for portable interactive maps?
Portable interactive maps can use rechargeable lithium-ion battery packs for indoor use and solar panel integration for outdoor applications. These power solutions enable classroom presentations and field demonstrations without requiring electrical outlets, making the maps truly portable for various educational settings.