7 Best Specialty Papers for Map Art
Why it matters: Map art has evolved beyond basic poster prints, with specialty papers transforming geographical prints into sophisticated home décor that rivals expensive gallery pieces.
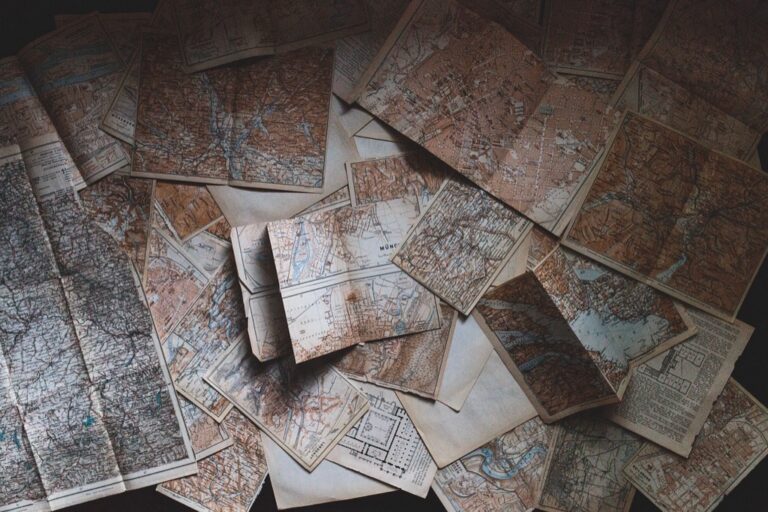
The big picture: You can create stunning wall art by combining vintage maps, modern cartography, or custom location prints with unique paper textures like handmade sheets, metallic finishes, or fabric-infused materials.
Explore history's most significant maps with *Great Maps*. This book delves into cartographic masterpieces and their historical context.

What’s next: These seven specialty paper techniques will help you craft personalized map artwork that showcases your favorite destinations while adding professional polish to any room in your home.
Disclosure: As an Amazon Associate, this site earns from qualifying purchases. Thank you!
P.S. check out Udemy’s GIS, Mapping & Remote Sensing courses on sale here…
Create Vintage-Style Maps Using Aged Parchment Paper
Bake with ease using Amazon Basics Parchment Paper. This non-stick, 90 sq ft roll fits standard baking pans and is oven-safe up to 425 degrees.

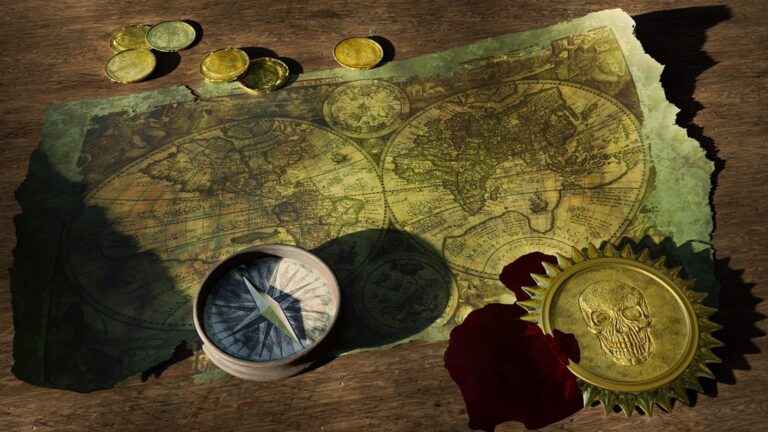
Transform your modern map prints into authentic-looking historical documents using aged parchment paper techniques. This approach adds centuries of character to contemporary cartographic designs.
Choose the Right Parchment Weight and Texture
Select 140-200gsm parchment paper for optimal durability and authentic feel. Heavy-weight papers like Neenah Parchment or Southworth Parchment provide the substantial texture that mimics historical documents. Avoid lightweight papers under 90gsm as they’ll wrinkle excessively during aging treatments. Look for papers with natural fiber content and subtle texture variations that enhance the vintage appearance. Pre-textured options like vellum or laid parchment offer built-in aging characteristics that complement your map designs perfectly.
Apply Tea or Coffee Staining Techniques
Brew strong black tea or dark roast coffee and let it cool completely before application. Use a wide foam brush to apply the liquid in overlapping strokes across your printed map surface. Work quickly to avoid water damage to your ink, starting from one corner and maintaining consistent coverage. Allow 15-20 minutes drying time between coats for deeper aging effects. Create natural-looking stain variations by dabbing with paper towels while the surface remains slightly damp for authentic weathered patterns.
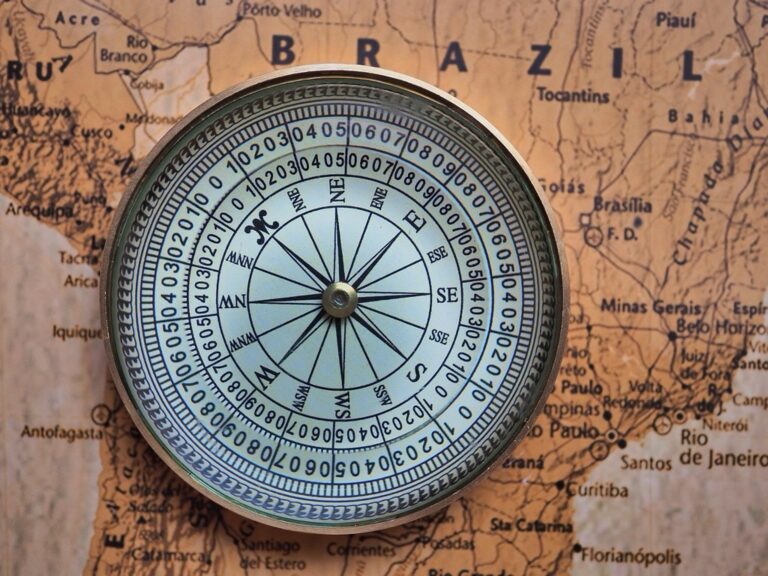
Select Historical Map Designs That Complement the Aged Look
Choose map styles from the 15th-18th centuries featuring ornate compass roses, decorative cartouches, and hand-drawn coastlines. Antique nautical charts and exploration maps work exceptionally well with parchment aging techniques. Avoid modern satellite imagery or contemporary street maps that clash with the vintage aesthetic. Focus on designs with sepia tones, muted colors, and classical typography that enhance rather than compete with your aging effects. Historical world maps and regional surveys from colonial periods provide the most convincing vintage appearance.
Design Modern Wall Art With Metallic Foil Papers
Metallic foil papers transform contemporary map art into sophisticated home décor pieces that capture light and create stunning visual impact. These specialty papers elevate your cartographic displays beyond traditional flat prints.
Incorporate Gold and Silver Accents on City Maps
City maps benefit from strategic metallic highlighting that emphasizes urban landmarks and major thoroughfares. Apply gold foil to highlight historical districts, financial centers, or premium neighborhoods on detailed street maps. Silver accents work particularly well for modern cityscapes, creating emphasis on contemporary architecture zones, transit systems, and waterfront areas. Use foil sparingly on 10-15% of map elements to maintain readability while adding luxurious visual appeal.
Use Copper Foil for Warm-Toned Travel Destinations
Shield electronics from EMI and create crafts with this 2-inch x 33-foot copper foil tape. Its flexible, conductive adhesive allows for easy application by hand for repairs, grounding, and more.

Copper foil complements warm-climate destinations and creates inviting visual warmth for travel-inspired map art. Mediterranean coastlines, desert landscapes, and tropical island maps gain authentic character when copper highlights emphasize beaches, mountain ranges, or cultural landmarks. The reddish-brown metallic tone pairs beautifully with sepia-toned base maps and enhances sunset photography backgrounds. Apply copper foil to elevation contours, historic trade routes, or significant geographical features for maximum visual impact.
Apply Foil Transfer Techniques for Professional Results
Professional foil transfer requires proper heat settings and consistent pressure for clean, durable results. Use a heat press set to 300-320°F with medium pressure for 15-20 seconds on cardstock weight papers. Position foil sheets with adhesive side down, ensuring complete coverage over designated map areas. Remove transfer film immediately while warm to prevent adhesive residue. Practice on test prints first, as different paper weights require slight temperature adjustments for optimal adhesion.
Craft Interactive Maps Using Textured Cardstock
Textured cardstock transforms flat map displays into engaging tactile experiences that invite exploration. This heavyweight paper stock provides the structural foundation needed for dimensional mapping projects.
Add Raised Elements for Tactile Exploration
Raised elements create physical landmarks that enhance map readability through touch. You’ll achieve this effect by layering cardstock pieces or applying dimensional mediums like modeling paste to highlight mountain ranges, coastlines, and urban centers. Cut varying thicknesses of cardstock to represent different elevations, with thicker layers indicating higher altitudes. Secure each layer with repositionable spray adhesive to prevent warping while maintaining clean edges that define geographic boundaries.
Create Layered Topographical Effects
Layered topographical effects showcase elevation changes through strategic cardstock stacking. You’ll need cardstock in graduated thicknesses—typically 110gsm for base layers up to 300gsm for peak elevations. Trace contour lines from topographic maps onto each cardstock layer, cutting progressively smaller shapes as elevation increases. Stack layers with precision alignment using registration marks, creating convincing relief that mirrors actual terrain. This technique works exceptionally well for mountain ranges, canyons, and coastal features.
Incorporate Braille Elements for Accessibility
Braille elements make your textured map accessible to visually impaired users while maintaining aesthetic appeal. You’ll apply transparent Braille labels or embossed dots directly onto the cardstock surface using a Braille embosser or manual stylus. Position Braille text adjacent to major cities, landmarks, and geographic features without disrupting the visual design. Standard Braille cell dimensions require 6mm spacing, so plan your layout accordingly. This inclusive approach expands your map’s usability while demonstrating thoughtful design consideration.
Build Illuminated Map Displays With Translucent Vellum
Vellum paper transforms ordinary map displays into luminous art pieces that capture attention day and night. You’ll achieve professional results by combining the paper’s natural light-diffusing properties with strategic backlighting techniques.
Design Backlit World Map Features
Select heavyweight vellum (180-220gsm) to prevent sagging under heat from lighting elements while maintaining optimal light transmission. Position your map artwork with careful consideration of major geographic features like mountain ranges and coastlines that’ll create dramatic shadow patterns when illuminated. Mount the vellum between two frames with a 1-2 inch gap to accommodate lighting infrastructure. Focus on world maps with bold continental outlines and clear political boundaries that remain visible through the translucent material. Test your design with a small LED flashlight before committing to the full lighting setup.
Create Layered Lighting Effects
Stack multiple vellum sheets with varying opacity levels to build depth in your illuminated display. Place your primary map on the front vellum layer (180gsm) and add background elements like ocean textures or atmospheric effects on secondary sheets positioned 0.5-1 inch behind. Use different colored gels between layers to create sunrise effects over mountain ranges or deep blue ocean gradients. Control lighting zones independently by dividing your LED strips into separate circuits. This technique works particularly well with topographic maps where elevation changes benefit from graduated lighting intensity.
Use LED Strips for Even Light Distribution
Control these 100ft RGB LED strip lights via Bluetooth app or remote to customize colors and brightness. Sync them to music for a dynamic party atmosphere and set timers for automatic on/off.

Install flexible LED strip lights in parallel rows spaced 2-3 inches apart across the back panel to eliminate hot spots and dark zones. Choose color temperature between 3000K-4000K for warm white illumination that enhances the vellum’s natural cream tones without creating harsh shadows. Mount strips on aluminum channels to improve heat dissipation and extend LED lifespan beyond 25,000 hours. Use a diffusion panel between the LED strips and vellum to further smooth light distribution. Wire strips to a dimmer controller so you can adjust brightness levels from subtle accent lighting to full illumination for detailed map reading.
Construct Weather-Resistant Outdoor Maps Using Synthetic Papers
Synthetic papers revolutionize outdoor map displays by withstanding harsh weather conditions that would destroy traditional paper materials. You’ll create durable installations that maintain their visual appeal through seasons of rain, UV exposure, and temperature fluctuations.
Select Waterproof Materials for Garden Installations
Polypropylene synthetic papers provide the foundation for permanent outdoor map displays in garden settings. Choose 8-12mil thickness materials like Yupo or Teslin for optimal durability against moisture penetration. These substrates resist tearing, won’t delaminate when wet, and maintain dimensional stability through freeze-thaw cycles. Apply pigment-based inks during printing to prevent water-based dye bleeding. Mount finished maps on marine-grade aluminum composite panels using silicone-based adhesives for complete weatherproofing.
Apply UV-Resistant Coatings for Longevity
UV-blocking laminates extend your outdoor map’s lifespan from months to years by preventing color degradation. Select laminates with UV inhibitors rated for 5+ years outdoor exposure, such as 3M or Avery Dennison protective films. Apply liquid UV coatings like Drytac SpotOn for irregular surfaces or detailed relief elements. Test coating compatibility with your synthetic substrate before full application. Reapply protective coatings every 3-4 years in high-exposure locations to maintain color vibrancy and prevent surface chalking.
Design Trail Maps for Outdoor Recreation Areas
Trail mapping on synthetic substrates requires specialized design considerations for outdoor readability and safety. Use high-contrast color schemes with WCAG AA compliance standards for visibility in varying light conditions. Incorporate tactile elements using raised vinyl lettering for key waypoints and emergency information. Size text at minimum 12-point for distance viewing and include QR codes linking to digital trail updates. Position maps at 45-degree angles in weatherproof display cases to minimize glare and water pooling on viewing surfaces.
Develop Educational Maps Using Magnetic Paper Sheets
Create custom magnets with these 8" x 10" adhesive magnetic sheets. Simply peel, stick your image, and cut to any shape for decorating metal surfaces.

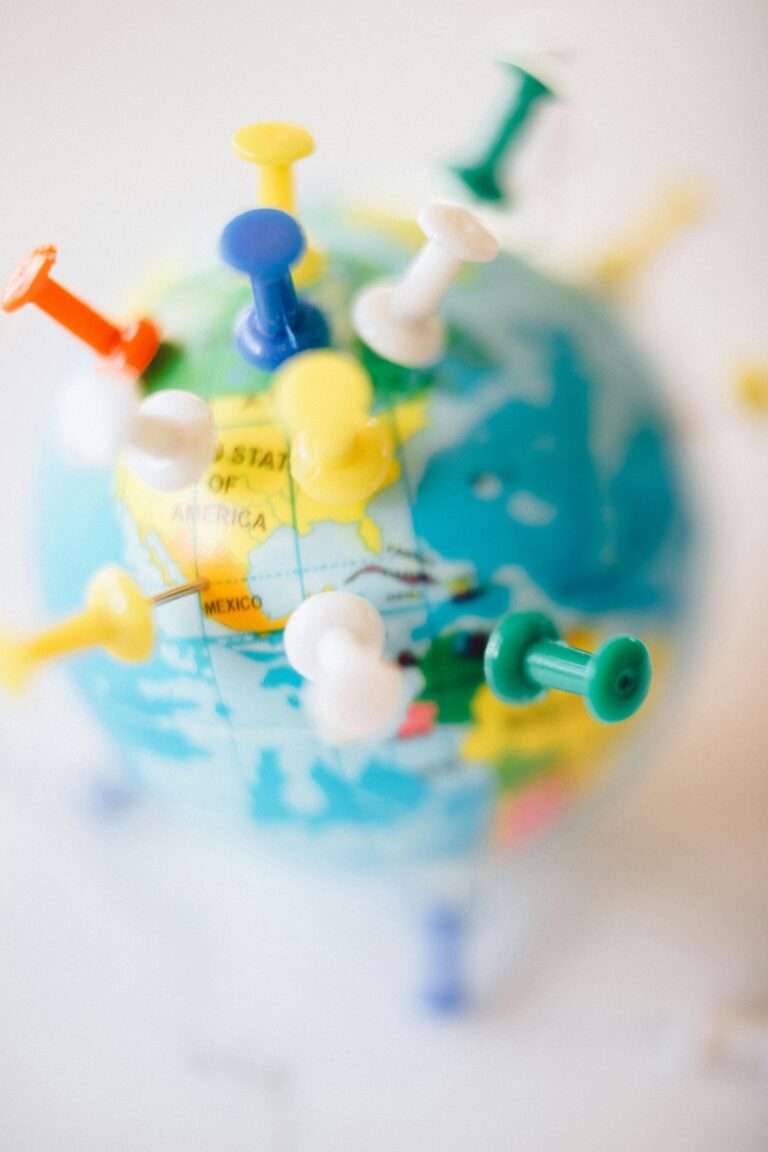
Transform your map art into dynamic teaching tools using magnetic paper sheets that offer unlimited repositioning possibilities. You’ll create engaging learning environments where geography concepts come alive through hands-on manipulation.
Create Moveable Map Elements for Learning
Design individual magnetic pieces representing countries, states, or geographic features using printable magnetic sheets. You can cut out puzzle-like sections that students physically move and arrange on metal surfaces or magnetic whiteboards. Layer multiple magnetic sheets to create thickness variations for different map elements like mountains, rivers, and political boundaries. Print population data, climate zones, or economic indicators on separate magnetic overlays that attach and detach for comparative studies across different map themes.
Design Interactive Geography Lessons
Structure lesson plans around magnetic map manipulation activities that reinforce spatial relationships and geographic concepts. You’ll enable students to reconstruct continental drift sequences by moving magnetic landmasses across timeline displays. Create scenario-based exercises where learners reposition climate zone markers to demonstrate seasonal changes or move population density indicators to show historical migration patterns. Design quiz formats using magnetic answer pieces that students place on corresponding map locations for immediate visual feedback.
Apply Magnetic Backing to Traditional Paper Maps
Attach adhesive magnetic sheeting to existing paper maps using spray adhesive or double-sided magnetic tape for instant conversion. You should select 0.5-1mm thickness magnetic backing to maintain flexibility while ensuring strong attachment to metal surfaces. Cut strategic sections rather than backing entire maps to reduce weight and cost while maintaining educational functionality. Apply clear protective laminate over paper surfaces before magnetic backing to prevent tearing during repeated handling and repositioning activities.
Produce Luxury Art Pieces Using Handmade Specialty Papers
Handmade specialty papers transform ordinary maps into museum-quality art pieces that command attention and add sophisticated elegance to any space.
Source Artisan Papers With Unique Textures
Select papers from established artisan mills like Hiromi Paper or Talas for consistent quality and archival properties. Look for cotton rag papers with 25% or higher cotton content that provide superior longevity compared to wood pulp alternatives. Choose textures like laid patterns, watermarks, or deckled edges that complement your map’s historical period. Consider handmade papers from Nepal, Thailand, or Japan that incorporate traditional fiber processing techniques for authentic character.
Incorporate Natural Fibers and Embedded Elements
Integrate papers containing visible plant fibers like bamboo, hemp, or mulberry bark that create subtle texture variations throughout your map design. Add embedded elements such as flower petals, leaves, or seeds that relate to your map’s geographic region for thematic coherence. Position natural inclusions strategically around map borders or ocean areas where they won’t obscure important geographic details. Test fiber stability under UV light exposure to ensure embedded elements won’t fade or deteriorate over time.
Frame Maps to Highlight Paper Quality and Craftsmanship
Use museum-quality matting with acid-free materials that create generous borders showcasing the paper’s natural edges and texture. Select frames with deep rabbet depths accommodating thicker handmade papers without compression or buckling. Install UV-filtering glazing that protects delicate fibers while maintaining color accuracy and visual clarity. Position lighting at 30-45 degree angles to emphasize paper texture through controlled shadows that reveal the dimensional qualities of handmade surfaces.
Conclusion
These seven specialty paper techniques will transform your ordinary map prints into extraordinary conversation pieces that reflect your personal style and travel memories. Whether you’re creating vintage parchment masterpieces for your study or installing weather-resistant trail maps in your garden you now have the knowledge to execute professional-quality results.
The key to successful map art lies in matching the right paper to your intended purpose and environment. From magnetic educational displays that engage young learners to luxurious handmade paper pieces that rival gallery artwork each technique offers unique opportunities to showcase your favorite destinations.
Start with one technique that resonates with your current décor goals and gradually expand your skills as you gain confidence. Your walls will thank you for the upgrade and your guests will be impressed by your creative cartographic displays.
Frequently Asked Questions
What paper weight is best for creating vintage-style map art?
For authentic-looking vintage maps, use parchment paper between 140-200gsm. This weight range provides excellent durability while maintaining the flexibility needed for aging techniques like tea or coffee staining. The heavier weight prevents tearing during the distressing process and gives your finished piece a substantial, professional feel that mimics historical documents.
How do I apply metallic foil to contemporary map prints?
Use proper heat settings and consistent pressure when applying foil transfer techniques. Gold and silver foils work best for highlighting urban landmarks and major roads on city maps, while copper foil adds warmth to tropical destination maps. Always test your heat press settings on sample paper first to ensure clean adhesion without damaging the underlying map design.
What’s the best paper for weather-resistant outdoor map displays?
Polypropylene synthetic papers like Yupo or Teslin are ideal for outdoor installations. These materials resist moisture, UV damage, and temperature fluctuations. Apply UV-resistant coatings or laminates for extended protection. Choose high-contrast color schemes and consider tactile elements for trail maps to ensure visibility and safety in outdoor recreation areas.
Can I make maps accessible for visually impaired users?
Yes, incorporate Braille elements and raised textures using layered cardstock techniques. Create tactile landmarks by stacking cardstock pieces of graduated thickness to represent elevation changes. Use dimensional mediums to highlight important features while maintaining the map’s aesthetic appeal. This approach makes your map art both inclusive and visually striking.
What vellum weight works best for backlit map displays?
Use heavyweight vellum between 180-220gsm for illuminated displays. This weight prevents sagging under heat from LED lighting while maintaining optimal light transmission. Layer multiple vellum sheets to create depth and use LED strips for even light distribution. Test positioning carefully to achieve dramatic shadow patterns and effective lighting effects.
How do I create interactive educational maps?
Apply magnetic backing to traditional paper maps or use magnetic paper sheets to create moveable elements. This allows students to manipulate geographic features, cities, or countries for hands-on learning. Design elements representing different geographic features that can be repositioned to reinforce spatial relationships and make geography lessons more engaging and memorable.
What makes handmade papers suitable for luxury map art?
Create beautiful crafts with this A4 mulberry paper. Made from natural plant fibers, these sheets offer a unique texture perfect for painting, writing, decoupage, and more.

Cotton rag papers from established mills offer superior longevity and unique textures that elevate ordinary maps to museum quality. Look for papers with natural fiber inclusions and embedded elements that enhance thematic coherence. Frame with museum-quality materials to highlight the paper’s craftsmanship and ensure proper presentation of the dimensional qualities.