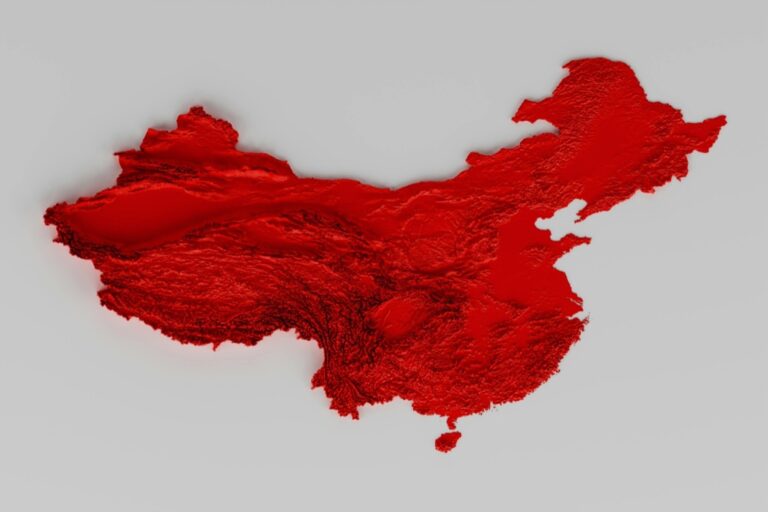
6 Methods for Analyzing Terrain Data with Shading That Reveal Hidden Patterns
You’ve got terrain data but struggle to extract meaningful insights from complex elevation patterns and surface features. Shading techniques transform raw topographic information into visual representations that reveal hidden landscape characteristics — from subtle drainage patterns to steep slope hazards that could impact your projects.
Whether you’re planning infrastructure developments or conducting environmental assessments these six proven methods will help you analyze terrain data more effectively. Each technique offers unique advantages for different analysis goals and data types.
Mastering these shading approaches gives you the analytical edge to make informed decisions about land use planning site selection and risk assessment based on accurate terrain interpretation.
Disclosure: As an Amazon Associate, this site earns from qualifying purchases. Thank you!
P.S. check out Udemy’s GIS, Mapping & Remote Sensing courses on sale here…
Hillshade Analysis: The Foundation of Terrain Visualization
Achieve a flawless, even complexion with e.l.f. Flawless Satin Foundation. This lightweight, vegan formula provides medium coverage and a semi-matte finish for all-day wear, while hydrating your skin with glycerin.

Hillshade analysis forms the cornerstone of modern terrain visualization by simulating how sunlight illuminates topographic surfaces. This fundamental technique transforms elevation data into intuitive relief representations that reveal landscape structure and terrain complexity.
Understanding Light Source Positioning
Position your light source at optimal angles to enhance terrain features effectively. Set the azimuth between 315° and 45° (northwest to northeast) to simulate natural morning or evening illumination. Configure elevation angles between 25° and 45° for most terrain types, with lower angles emphasizing subtle relief features and higher angles reducing shadow contrast. Adjust these parameters based on your analysis objectives—steeper angles highlight major landforms while shallow angles reveal micro-topography details.
Calculating Slope and Aspect Values
Calculate slope values using the maximum rate of elevation change between adjacent cells. Modern GIS software computes slope as the arctangent of the rise-over-run ratio, typically expressed in degrees or percent. Determine aspect values by measuring the downhill direction of maximum slope, ranging from 0° to 360° clockwise from north. These calculations form the mathematical foundation for hillshade generation, where slope steepness controls shadow intensity and aspect direction determines illumination angles relative to your light source position.
Creating Basic Relief Maps
Explore the United States with this 3D raised relief map. Feel the terrain and understand topography through its tactile, vacuum-formed design.

Generate relief maps by combining elevation data with calculated hillshade values for enhanced visualization. Apply transparency settings between 30-50% to your hillshade layer, allowing underlying elevation colors to show through while maintaining shadow definition. Use color ramps that progress from dark browns or greens in valleys to lighter tans or whites on peaks. Consider hybrid approaches that blend contour lines with hillshade effects to provide both qualitative visual appeal and quantitative elevation reference points for professional cartographic products.
Multidirectional Hillshade Technique for Enhanced Detail
This advanced technique overcomes the limitations of single-source illumination by combining multiple hillshade layers from different light positions. You’ll achieve more balanced terrain visualization that reveals features hidden by traditional shadow patterns.
Combining Multiple Light Sources
Position four light sources at 45°, 135°, 225°, and 315° azimuth angles with consistent 35° elevation to capture all terrain aspects. Set each hillshade layer’s transparency to 25% and use multiply blending mode in ArcGIS Pro or QGIS. Calculate final pixel values using weighted averaging: multiply each hillshade by 0.25, then sum results. This approach eliminates directional bias and ensures uniform illumination across your study area.
Reducing Shadow Artifacts
Apply Gaussian blur with 1-2 pixel radius to each individual hillshade before combining to soften harsh shadow edges. Use histogram equalization on the final composite to redistribute shadow values across the full grayscale range. Set minimum output values to 15% gray instead of pure black to preserve detail in shadowed areas. Consider adding 10-15% ambient lighting through layer blending to simulate atmospheric scattering effects commonly found in natural lighting conditions.
Improving Valley and Ridge Definition
Enhance linear features by applying directional filtering perpendicular to dominant ridge orientations before hillshade calculation. Use 3×3 edge enhancement kernels on your DEM to sharpen topographic breaks, then generate multidirectional hillshade from the filtered elevation data. Combine the enhanced hillshade with curvature analysis using 50% transparency to emphasize both convex ridges and concave valleys. This technique produces superior definition for watershed analysis and geological interpretation tasks.
Analytical Hillshade Method for Precise Measurements
You’ll achieve the highest accuracy in terrain analysis by applying mathematical algorithms that calculate exact illumination values rather than relying on visual approximations. This analytical approach transforms hillshade from a visualization tool into a quantitative measurement system.
Mathematical Algorithms for Accuracy
Calculate illumination values using the dot product formula between surface normal vectors and light direction vectors. You’ll multiply the cosine of the incident angle by 255 to generate precise grayscale values from 0 to 255. Modern GIS software like ArcGIS Pro and QGIS implement Horn’s algorithm, which computes slope and aspect derivatives using a 3×3 kernel matrix. Apply Zevenbergen-Thorne algorithms for smoother surfaces when working with high-resolution DEMs exceeding 10-meter resolution.
Quantitative Terrain Assessment
Measure terrain characteristics by extracting statistical data from your analytical hillshade outputs rather than visual interpretation alone. You’ll calculate mean illumination values across watersheds, ridgelines, and slope classes to identify morphological patterns. Generate histograms showing illumination distribution to detect terrain asymmetry and preferred slope orientations. Extract quantitative metrics including standard deviation, skewness, and kurtosis values to characterize landscape roughness and directional bias for scientific reporting.
Scientific Data Interpretation
Convert illumination values into measurable terrain parameters using standardized classification systems and statistical analysis. You’ll correlate hillshade intensity with actual slope steepness measurements to validate your analytical results. Apply t-tests and ANOVA statistical methods to compare illumination patterns between different geological formations or land cover types. Document your methodology using ISO 19115 metadata standards to ensure reproducibility and scientific validity in peer-reviewed publications.
Aspect-Based Shading for Directional Analysis
Aspect-based shading transforms terrain analysis by mapping the directional orientation of slopes across your landscape. This technique reveals critical patterns in slope direction that standard hillshading methods often mask.
Compass Direction Mapping
Compass direction mapping assigns color values to slopes based on their cardinal orientation. You’ll generate aspect raster datasets where north-facing slopes display in blue, south-facing slopes in red, east-facing in yellow, and west-facing in green. Modern GIS software like ArcGIS Pro and QGIS calculate aspect values from 0° to 360° using neighborhood analysis algorithms. This visualization immediately reveals predominant slope orientations across your study area, helping you identify terrain patterns for erosion analysis and vegetation studies.
Seasonal Sun Exposure Studies
Seasonal sun exposure studies combine aspect data with solar geometry calculations to predict illumination patterns throughout the year. You’ll input latitude coordinates and seasonal sun angle parameters to model how terrain orientation affects sunlight exposure during different months. Winter months require low sun angle calculations (15-25° elevation), while summer analysis uses higher angles (60-75° elevation). This technique proves essential for agricultural planning, solar panel installations, and understanding microclimate variations across complex topography.
Watershed Boundary Identification
Watershed boundary identification uses aspect analysis to trace natural drainage divides and flow direction patterns. You’ll process aspect raster data through flow accumulation algorithms that follow slope orientation vectors to delineate catchment areas. Ridge lines appear where aspect values change rapidly between opposing directions, typically showing 180° variations within short distances. Combine this with elevation contours and stream network data to verify watershed boundaries and identify potential flood-prone areas for hydrological modeling projects.
Slope Shading Technique for Gradient Visualization
Slope shading transforms elevation data into intuitive visual representations that reveal terrain steepness patterns across your mapping area. You’ll generate gradient classifications that highlight critical terrain characteristics for engineering analysis and risk assessment.
Steepness Classification Systems
You’ll categorize slopes using standardized percentage ranges to create meaningful terrain classifications. Gentle slopes (0-8%) appear in light colors, moderate slopes (8-25%) display in medium tones, and steep slopes (25%+) render in dark shades. Professional mapping standards recommend five-class systems: flat (0-2%), gentle (2-8%), moderate (8-15%), steep (15-35%), and very steep (35%+). You can customize these thresholds based on your specific analysis requirements and local terrain conditions.
Erosion Risk Assessment
You’ll identify erosion-prone areas by correlating slope gradients with soil vulnerability data and precipitation patterns. Slopes exceeding 15% combined with loose soil conditions create high-risk zones that require immediate attention. Your analysis should integrate USLE (Universal Soil Loss Equation) factors including slope length, steepness, and cover management practices. You can generate risk matrices by overlaying slope classifications with vegetation coverage and rainfall intensity data to predict erosion potential accurately.
Construction Suitability Analysis
You’ll evaluate terrain suitability for development projects by analyzing slope limitations and foundation requirements. Building codes typically restrict construction on slopes exceeding 30% without specialized engineering solutions. Your assessment should consider access road feasibility, utility installation costs, and drainage patterns when slopes surpass 15%. You can create suitability maps by combining slope analysis with soil bearing capacity data, flood zones, and setback requirements to guide development planning decisions.
Sky-View Factor Shading for Topographic Openness
Sky-view factor shading transforms terrain analysis by measuring how much open sky is visible from any point on the landscape. This technique reveals topographic openness patterns that traditional hillshade methods can’t capture.
Calculating Visible Sky Percentage
Calculate visible sky percentage by casting rays in all directions from each terrain point and measuring obstruction angles. ArcGIS Pro’s Sky-View Factor tool samples 32 directional vectors at 11.25° intervals to compute openness values. You’ll generate percentage values ranging from 0% (completely enclosed) to 100% (fully exposed terrain). Configure the search radius between 100-1000 meters depending on your analysis scale and terrain complexity.
Identifying Enclosed Valleys
Identify enclosed valleys using sky-view factor values below 20% to pinpoint areas with significant topographic confinement. QGIS Relief Visualization Toolbox automatically highlights these low-openness zones with dark blue color ramps. You can extract valley polygons by reclassifying sky-view rasters and converting them to vector features. Cross-reference these results with drainage network data to validate natural valley boundaries and identify potential flood retention areas.
Measuring Terrain Exposure Levels
Measure terrain exposure levels by categorizing sky-view factor percentages into standardized classes: sheltered (0-30%), moderate (30-70%), and exposed (70-100%). SAGA GIS provides statistical analysis tools to calculate mean exposure values across different elevation zones. You’ll create exposure gradient maps that reveal wind susceptibility patterns and microclimate variations. Apply these measurements to assess avalanche risk zones and optimize weather station placement for accurate meteorological monitoring.
Get real-time weather data with the Ambient Weather WS-2902. This WiFi-enabled station measures wind, temperature, humidity, rainfall, UV, and solar radiation, plus it connects to smart home devices and the Ambient Weather Network.

Conclusion
You now have six powerful terrain analysis methods at your disposal that’ll transform how you visualize and interpret landscape data. Each technique serves specific purposes – from traditional hillshade for basic visualization to sky-view factor analysis for complex exposure measurements.
Your choice of method depends on your project goals whether you’re assessing construction sites conducting environmental studies or planning infrastructure development. The combination of multiple techniques often yields the most comprehensive understanding of terrain characteristics.
Start with basic hillshade analysis and gradually incorporate advanced methods like multidirectional shading and analytical techniques as your expertise grows. Remember that effective terrain analysis requires both technical proficiency and understanding of the underlying landscape processes you’re studying.
Frequently Asked Questions
What are the main challenges in extracting insights from complex terrain data?
The primary challenges include visualizing complex topographic information effectively and revealing critical landscape features like drainage patterns and slope hazards. Traditional methods often obscure important details, making it difficult to make informed decisions for infrastructure planning and environmental assessments. Proper shading techniques are essential to overcome these visualization challenges.
What is hillshade analysis and why is it important?
Hillshade analysis is the foundation of modern terrain visualization that simulates sunlight on topographic surfaces. It enhances terrain features by creating shadows and highlights, making elevation changes more visible. This technique is crucial for understanding landscape structure and forms the basis for more advanced terrain analysis methods.
What are the optimal light source settings for hillshade analysis?
For effective hillshade visualization, use azimuth angles between 315° and 45° and elevation angles between 25° and 45°. These settings provide the best balance of shadow and illumination to reveal terrain features clearly without creating overly dramatic or washed-out effects that could obscure important topographic details.
How does multidirectional hillshade improve upon traditional single-source hillshade?
Multidirectional hillshade combines multiple hillshade layers from different light positions, eliminating the limitations of single-source illumination. This method provides more balanced terrain visualization by revealing features that would be obscured by traditional shadow patterns, offering a comprehensive view of the landscape from multiple angles simultaneously.
What is analytical hillshade and how does it differ from other methods?
Analytical hillshade uses mathematical algorithms like Horn’s algorithm and Zevenbergen-Thorne algorithms to achieve precise measurements of terrain characteristics. Unlike visual methods, it calculates illumination values using mathematical formulas, enabling quantitative analysis and statistical data extraction for scientific research and reproducible results.
How can aspect-based shading enhance terrain analysis?
Aspect-based shading maps the directional orientation of slopes using color-coding based on cardinal directions. This technique helps identify terrain patterns for erosion studies, vegetation analysis, and seasonal sun exposure modeling. It’s particularly valuable for agricultural planning, solar panel installations, and understanding drainage patterns.
What is slope shading and what are its practical applications?
Slope shading transforms elevation data into visual representations showing terrain steepness patterns. It’s used for steepness classification, erosion risk assessment, and construction suitability analysis. This technique helps identify high-risk zones, evaluate terrain for development projects, and create suitability maps for planning decisions.
What is sky-view factor shading and when should it be used?
Sky-view factor shading measures the amount of open sky visible from any point on the landscape, revealing topographic openness patterns. It’s particularly useful for identifying enclosed valleys, assessing avalanche risk zones, and optimizing weather station placements. This method captures terrain characteristics that traditional hillshade methods cannot reveal.
How can these terrain analysis techniques be combined for better results?
Combining multiple techniques provides comprehensive terrain analysis. For example, merging hillshade with elevation data creates basic relief maps, while integrating aspect and slope data enhances risk assessment capabilities. Using transparency settings and appropriate color ramps helps create both aesthetically pleasing and scientifically accurate visualizations.
What statistical methods should be used to validate terrain analysis results?
Use standardized classification systems and calculate metrics like standard deviation and skewness from analytical outputs. Generate histograms to understand data distribution and apply scientific validation methods to ensure reproducibility. This approach maintains scientific validity and enables peer review of terrain analysis research.