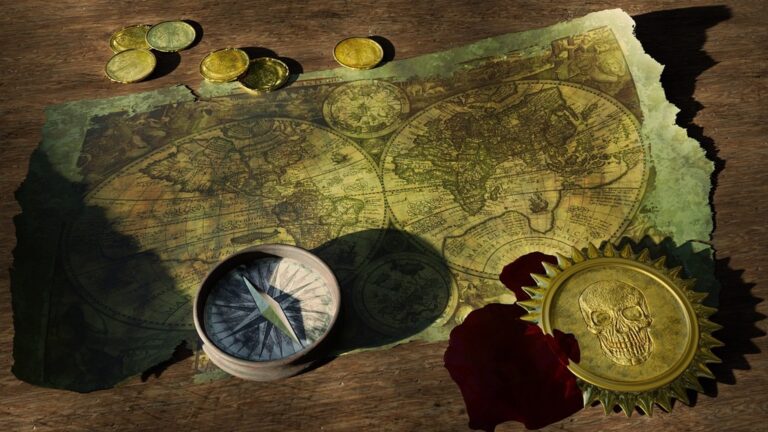
7 Best Visual Design Techniques
Maps fail when viewers can’t distinguish between different elements – and that’s where visual contrast becomes your secret weapon. Whether you’re designing navigation apps, data visualizations, or educational materials, the right contrast techniques transform confusing maps into clear, actionable tools that users actually want to engage with. The bottom line: Mastering these seven contrast methods will elevate your map design from amateur to professional, ensuring every element serves its purpose while creating an intuitive user experience.
Disclosure: As an Amazon Associate, this site earns from qualifying purchases. Thank you!
Color Contrast: Creating Visual Hierarchy Through Strategic Color Choices
Color choices determine whether your map communicates effectively or confuses users. Strategic color contrast establishes clear visual relationships between map elements.
Understanding Color Temperature Differences
Cool colors recede while warm colors advance in visual perception, creating natural depth on your map. Use cool blues and greens for background elements like water bodies and vegetation, reserving warm reds and oranges for points of interest or critical infrastructure. This temperature contrast helps users distinguish between primary navigation elements and supporting geographic features without conscious effort.
P.S. check out Udemy’s GIS, Mapping & Remote Sensing courses on sale here…
Implementing Complementary Color Schemes
Complementary colors create maximum visual separation between map elements that need clear distinction. Place orange highway markers against blue water features, or use red-green combinations for contrasting data categories in thematic maps. Adobe Color and ColorBrewer provide tested complementary palettes specifically designed for cartographic applications, ensuring your color choices remain accessible across different viewing conditions.
Enjoy refreshing water with the Avalon Bottom Loading Water Cooler. It offers hot, cold, and room temperature options, a BioGuard anti-microbial coating, and a child safety lock for peace of mind.

Using Saturation Levels for Emphasis
High saturation draws attention while muted tones provide context in effective map hierarchies. Reserve fully saturated colors for critical waypoints, emergency services, or active route guidance, while using desaturated versions for secondary roads and background infrastructure. This saturation gradient creates intuitive importance levels—users naturally focus on the brightest elements first, then process supporting information in order of visual prominence.
Size Contrast: Scaling Elements to Guide Reader Attention
Size variations create immediate visual priorities that your users process instinctively before reading any labels or analyzing colors.
Varying Symbol Sizes for Data Representation
Proportional symbols transform raw data into intuitive visual stories by scaling markers to match their underlying values. You’ll achieve the strongest data representation when your largest symbols are 3-5 times bigger than your smallest ones. Population density maps work exceptionally well with graduated circles where 10,000 residents might use a 12-pixel radius while 100,000 residents get a 24-pixel radius. Consider using square root scaling rather than linear scaling to prevent your largest values from overwhelming the entire map composition.
Adjusting Text Size for Information Hierarchy
Text scaling establishes clear reading priorities that guide users through your map’s information layers systematically. Primary city names should use 14-16pt fonts while secondary features work best at 10-12pt and tertiary labels at 8-10pt. You’ll maintain readability across zoom levels by setting minimum text sizes—never let critical labels drop below 8pt even at maximum zoom out. Street names need consistent sizing within their classification: arterials at 11pt, collectors at 9pt, and local streets at 8pt creates natural wayfinding hierarchy.
Creating Focal Points Through Scale Differences
Strategic oversizing draws immediate attention to your most critical map elements while maintaining overall visual balance. You can amplify important landmarks by making them 150-200% larger than similar features—a hospital symbol at 18px stands out clearly among 12px commercial icons. Emergency services, transit hubs, and key destinations benefit from this selective emphasis. Balance these focal points by distributing them evenly across your map extent rather than clustering oversized elements in one quadrant.
Shape Contrast: Differentiating Map Elements Through Form Variation
Shape contrast leverages geometric diversity to create visual separation between different data categories. By varying the fundamental forms of your map symbols, you’ll establish clear distinctions that users can quickly identify and understand.
Geometric vs. Organic Shape Combinations
Geometric shapes like circles, squares, and triangles work best for precise point data such as facilities, landmarks, and infrastructure. Organic shapes with flowing curves represent natural features like water bodies, vegetation, and terrain boundaries. You’ll create stronger visual hierarchy when combining angular government buildings (squares) with curved parks (organic shapes), making each category instantly recognizable through form alone.
Using Simple vs. Complex Symbol Designs
Simple symbols consisting of basic geometric forms perform better at smaller scales and maintain clarity across zoom levels. Complex symbols with detailed internal structure work for large-scale maps where recognition detail matters. Reserve intricate designs for prominent features like airports or hospitals, while using simple dots for numerous point locations. This approach prevents visual clutter while maintaining functional distinction.
Implementing Consistent Shape Families
Shape families group related map elements under unified geometric themes while maintaining individual recognition. Assign triangular variations to all transportation symbols—upward triangles for airports, sideways for train stations. Square families work well for institutional buildings, with size and fill variations distinguishing schools from government offices. This systematic approach creates intuitive user understanding through consistent visual logic.
Texture Contrast: Adding Visual Interest Through Surface Patterns
Texture contrast transforms flat map surfaces into dynamic visual experiences that guide user attention through tactile-inspired patterns. Strategic texture application creates immediate visual separation between different geographic features while maintaining professional cartographic standards.
Combining Smooth and Rough Visual Textures
Smooth textures work best for water bodies, urban areas, and transportation networks where clean lines communicate clarity. You’ll achieve maximum contrast by pairing these with rough textures like stippled patterns for forests, crosshatched fills for agricultural zones, or irregular dots for geological formations. This combination creates natural visual boundaries that users instinctively recognize without requiring legend consultation.
Using Pattern Fills for Area Differentiation
Pattern fills provide powerful alternatives to solid colors when distinguishing between multiple area types on your map. Use diagonal line patterns for residential zones, horizontal lines for commercial areas, and dot patterns for parklands. Adobe Illustrator‘s pattern libraries offer professional-grade fills, while QGIS provides customizable SVG patterns that maintain crispness across all zoom levels for digital applications.
Learn Adobe Illustrator with the 2025 release of this comprehensive guide. Master essential skills through hands-on lessons.

Balancing Detailed and Simple Texture Elements
Detailed textures should highlight your map’s most important features—use intricate patterns sparingly for key landmarks or critical data points. Simple textures form the foundation, covering large background areas with subtle patterns that won’t compete for attention. Maintain a 70/30 ratio where simple textures dominate the composition while detailed elements create strategic focal points that enhance rather than overwhelm your overall design.
Achieve a flawless, even complexion with e.l.f. Flawless Satin Foundation. This lightweight, vegan formula provides medium coverage and a semi-matte finish for all-day wear, while hydrating your skin with glycerin.

Value Contrast: Leveraging Light and Dark for Maximum Impact
Value contrast forms the backbone of readable map design by establishing clear tonal differences between map elements. Professional cartographers rely on strategic light-dark relationships to create visual hierarchy that guides users naturally through complex spatial information.
Explore and map the wilderness for the Queen in Cartographers! Draw unique terrain shapes and score points based on randomly selected goals each game, but beware of monster ambushes.

Understanding Grayscale Relationships
Grayscale values determine your map’s fundamental readability across all viewing conditions and color-blind accessibility scenarios. You’ll achieve optimal separation by maintaining at least 40% difference between adjacent tonal values on the grayscale spectrum. Background elements should occupy the 10-30% range while foreground features command the 70-90% range. Tools like Adobe Photoshop’s grayscale preview or online contrast analyzers help you evaluate tonal relationships before finalizing color schemes. Test your value structure by converting finished maps to grayscale—if elements merge visually, you need stronger tonal separation.
Creating Depth Through Tonal Variation
Tonal layering creates natural depth perception that helps users distinguish between elevation changes, data categories, and spatial relationships. You’ll establish effective depth by assigning darker values to lower elevations and lighter values to higher terrain features. Background layers should maintain 20-40% opacity while mid-ground elements use 50-70% values and foreground features demand 80-100% intensity. Progressive tonal shifts between adjacent elevation bands create smooth visual transitions. Consider atmospheric perspective principles—distant features appear lighter and less contrasted than nearby elements, mimicking natural visual perception patterns.
Ensuring Accessibility with Proper Contrast Ratios
WCAG 2.1 standards require minimum 4.5:1 contrast ratios between text and background elements for professional map accessibility compliance. You’ll verify contrast ratios using tools like WebAIM’s Contrast Checker or Colour Contrast Analyser before publishing maps for public use. Critical navigation elements need 7:1 ratios while decorative features can use 3:1 minimums. Test your maps under various lighting conditions and screen types—what appears acceptable on high-resolution monitors may fail on mobile devices or printed materials. Implement redundant coding systems using both color and value differences to ensure information remains accessible across all user scenarios.
Experience smooth, tear-free gaming and video with the Acer KB272 G0bi 27" Full HD monitor, featuring Adaptive-Sync (FreeSync Compatible) and a rapid 1ms response time. Enjoy vibrant colors with 99% sRGB coverage and versatile connectivity through HDMI and VGA ports.

Orientation Contrast: Using Directional Elements for Dynamic Design
Orientation contrast breaks the monotony of horizontal and vertical alignments by introducing angular variations that create visual movement and hierarchy. Strategic directional changes guide users through complex geographical information while establishing clear visual separation between different map elements.
Varying Line Angles and Directions
Diagonal lines draw immediate attention compared to standard horizontal and vertical elements in your map layout. You’ll create stronger visual separation by alternating between 45-degree angles for primary features and 15-degree variations for secondary elements. Road networks benefit from maintaining their natural angles while administrative boundaries can use consistent 30-degree offsets to distinguish jurisdictional areas from transportation infrastructure.
Implementing Rotated Text Labels
Rotated labels follow natural feature alignments to enhance readability while creating directional contrast against standard horizontal text. You’ll achieve optimal results by rotating river names to match waterway flow at 10-15 degree angles and aligning mountain range labels with ridge directions. Reserve 90-degree vertical orientations for narrow urban streets and keep body text rotation between 15-45 degrees to maintain legibility across different viewing angles.
Creating Movement Through Diagonal Elements
Diagonal design elements establish visual flow patterns that guide users through your map’s information hierarchy. You’ll create dynamic compositions by positioning legend boxes at 5-degree angles and using diagonal grid overlays for reference systems. Arrow symbols work most effectively when oriented at 45-degree increments while maintaining consistent directional logic that supports your map’s primary navigation flow and data visualization objectives.
Density Contrast: Balancing Crowded and Empty Spaces
Effective density contrast transforms cluttered maps into intuitive navigation tools by strategically distributing information across your design canvas.
Managing Information Density Across Map Areas
Focus critical information in high-density zones while maintaining clarity through selective element placement. Urban centers naturally require more detailed symbology, street labels, and point-of-interest markers compared to rural areas. Create information hierarchies by clustering related features—group transit stops, landmarks, and street names within logical proximity. Use graduated symbol sizes to manage visual weight: larger symbols for primary features in dense areas, smaller ones for secondary elements. Reserve maximum detail for 20-30% of your map area to prevent visual overload while ensuring comprehensive coverage.
Using White Space Effectively
Leverage empty areas as design elements that guide user attention toward essential map features. White space around city labels creates natural reading zones that improve text legibility across different zoom levels. Position negative space strategically between competing visual elements—separate highway networks from local streets using buffer zones that prevent symbol overlap. Apply the 40% rule: maintain approximately 40% empty space in complex map sections to ensure visual clarity. Ocean areas, parks, and agricultural zones serve as natural white space that balances information-heavy urban regions.
Creating Visual Breathing Room
Establish clear separation between map layers through consistent spacing protocols that prevent element collision. Maintain minimum 3-pixel buffers between adjacent symbols to ensure individual feature recognition at standard viewing distances. Use graduated spacing techniques—increase white space around higher-priority features while reducing gaps between supporting elements. Implement consistent margin standards: 8-pixel minimum around major labels, 4-pixel for secondary text, and 2-pixel for minor annotations. This systematic approach creates natural reading rhythms that guide users through complex geographic information without visual fatigue.
Conclusion
Mastering these seven visual contrast techniques will transform your maps from functional tools into compelling visual narratives. You now have the framework to create designs that don’t just display information—they guide users intuitively through complex spatial data.
Remember that effective map design isn’t about using every technique simultaneously. It’s about selecting the right combination for your specific audience and purpose. Start with one or two contrast methods and gradually build your expertise.
Your users will notice the difference immediately. Maps with proper visual hierarchy reduce cognitive load and improve navigation efficiency. Whether you’re designing for mobile apps or printed materials you’ll create more accessible and professional results.
The best map designers understand that contrast serves clarity not decoration. Apply these principles consistently and you’ll develop an intuitive sense for what works in different contexts.
Frequently Asked Questions
What is visual contrast in map design?
Visual contrast in map design refers to the strategic use of different visual elements—such as color, size, shape, texture, value, orientation, and density—to create clear distinctions between map features. This technique enhances readability, guides user attention, and transforms complex geographic information into intuitive, professional-looking maps that users can easily navigate and understand.
How does color contrast improve map readability?
Color contrast establishes visual hierarchy by using strategic color choices to distinguish between different map elements. Cool colors naturally recede while warm colors advance, creating depth. High saturation should be reserved for critical waypoints, while muted tones provide context. Complementary color schemes maximize visual separation, and tools like Adobe Color help create accessible palettes.
What role does size contrast play in effective map design?
Size contrast guides reader attention by scaling elements proportionally to their importance. The most effective approach involves making the largest symbols 3-5 times bigger than the smallest ones. This technique transforms raw data into intuitive visual stories, establishes clear reading priorities for text, and creates focal points that draw immediate attention to critical map elements.
How can shape contrast enhance map visualization?
Shape contrast uses geometric diversity to create visual separation between different data categories. Simple geometric shapes work best for precise point data, while organic shapes suit natural features. Simple symbols prevent visual clutter at smaller scales, while complex designs can be reserved for prominent features. Consistent shape families help group related elements logically.
Why is texture contrast important in map design?
Texture contrast adds visual interest and guides user attention through surface patterns. Smooth textures work well for urban areas and water features, while rough textures suit natural landscapes. Pattern fills help differentiate areas, and maintaining a 70/30 ratio between detailed and simple textures ensures key features stand out without overwhelming the design.
What is value contrast and how does it improve accessibility?
Value contrast establishes clear tonal differences between map elements using grayscale relationships. A minimum 40% difference between adjacent tonal values is recommended, with specific opacity levels for different features. This technique ensures maps meet WCAG 2.1 accessibility standards and remain readable across various viewing conditions and for users with visual impairments.
How does orientation contrast create visual movement in maps?
Orientation contrast breaks monotonous horizontal and vertical alignments by introducing angular variations. Using diagonal lines for primary features, maintaining natural angles for road networks, and rotating text labels to align with natural features creates visual movement. This technique guides users through the map’s information hierarchy and enhances overall navigation experience.
What is density contrast and how does it prevent visual clutter?
Density contrast balances crowded and empty spaces by managing information distribution across the map. Critical information should be concentrated in high-density zones while maintaining clarity through selective element placement. Strategic use of white space creates visual breathing room, prevents visual fatigue, and ensures clear separation between different map layers for better user experience.