7 Creative Layout Techniques for Oversized Maps That Create Visual Impact
You’ve got an oversized map that’s too beautiful to fold away in a drawer â but figuring out how to display it properly can feel overwhelming. The big picture: Large-format maps present unique design challenges that standard framing simply can’t solve effectively. Why it matters: The right layout technique transforms your oversized cartographic treasure from wall clutter into a stunning focal point that enhances your entire space.
Disclosure: As an Amazon Associate, this site earns from qualifying purchases. Thank you!
Create a Gallery Wall With Multiple Map Sections
Dividing oversized maps into multiple sections creates an impactful gallery wall display that transforms your space into a sophisticated cartographic showcase.
Frame Individual Continent Pieces
Separate your world map into distinct continental sections to create manageable pieces for wall mounting. Cut along natural boundaries like coastlines and ocean borders for clean divisions. You’ll typically get 5-7 individual continent pieces from a standard world map. Mount each section in matching frames sized between 16×20 and 24×36 inches depending on your wall space and continent proportions.
P.S. check out Udemy’s GIS, Mapping & Remote Sensing courses on sale here…
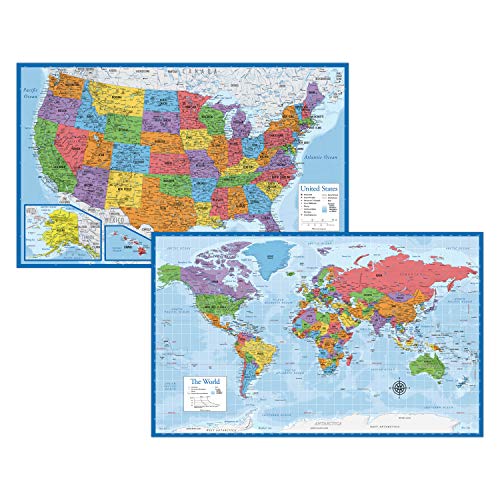
Get durable, tear-resistant posters made in the USA. Each 18" x 29" poster features high-quality 3 MIL lamination for lasting protection.
Use Consistent Matting and Frame Styles
Select identical frame materials and mat colors across all map sections to maintain visual cohesion throughout your gallery wall. Choose neutral mat colors like cream, light gray, or white that won’t compete with your map’s color palette. Keep frame widths consistent at 1-2 inches for smaller sections or 2-3 inches for larger continental pieces. This uniformity creates professional gallery-quality presentation.
Arrange Maps by Geographic Relationship
Position continental sections according to their actual geographic relationships to maintain spatial accuracy and visual flow. Place North America adjacent to South America, with Europe and Africa grouped nearby. Keep Asia and Australia in their relative positions to preserve the map’s educational value. Maintain 2-4 inches of consistent spacing between frames to create breathing room while preserving geographic connections.
Design a Floor-to-Ceiling Statement Wall
Transform your oversized maps into dramatic architectural features that command attention from floor to ceiling. This installation technique maximizes visual impact while creating an immersive cartographic experience.
Mount Maps Directly to Wall Surface
Apply high-quality adhesive mounting systems directly to your prepared wall surface for seamless map installations. You’ll need archival spray adhesives or dry-mount tissue specifically designed for large-format materials. Clean your wall thoroughly and ensure it’s completely smooth before application. Professional installers often use repositionable mounting films that allow minor adjustments during installation. This method works best on interior walls with minimal temperature fluctuations to prevent warping or lifting over time.
Get a strong, permanent bond on various surfaces with Gorilla Heavy Duty Spray Adhesive. This easy-to-use spray features a comfort nozzle for a controlled mist and dries clear for seamless projects, indoors or out.

Use Museum-Quality Mounting Techniques
Implement conservation-grade mounting methods that protect your maps while ensuring long-term stability. You’ll want to use acid-free backing boards and reversible adhesives that won’t damage the original material. Museum conservators recommend using wheat starch paste or synthetic adhesives that remain flexible over decades. Apply consistent pressure using professional mounting presses or hand tools designed for large formats. Document your mounting process with photos to assist future conservation efforts or removal procedures.
Create Seamless Edge-to-Edge Installation
Achieve continuous visual flow by carefully aligning map sections with millimeter precision during installation. You’ll need to plan your layout on paper first, marking reference points on both the wall and map sections. Professional installers use laser levels and measuring devices to ensure perfect alignment across multiple panels. Start from the center and work outward to minimize cumulative alignment errors. Trim overlapping edges with sharp blades to create invisible seams that maintain the map’s geographic integrity.
Build a Room Divider Using Map Panels
Transform your oversized maps into functional architectural elements by creating room dividers that serve dual purposes. Map panels offer an elegant solution for open floor plans while displaying your cartographic collection.
Construct Lightweight Panel Framework
Build your framework using aluminum channel rails and lightweight honeycomb panels for optimal stability. You’ll need 1-inch aluminum extrusion for the perimeter frame and polyethylene honeycomb core panels that won’t warp under tension. Mount your maps using conservation-grade spray adhesive directly to the honeycomb surface, ensuring even distribution to prevent bubbling. Connect multiple panels using heavy-duty piano hinges that allow folding for storage while maintaining structural integrity across the entire divider system.
Create professional LED strip light installations with this 10-pack of 6.6ft U-shaped aluminum channels. The milky cover diffuses light for a softer glow, while the channel protects strips from dust and damage.

Add Backlighting for Dramatic Effect
Install LED strip lighting behind translucent panels to create stunning illuminated map displays. You’ll achieve the best results using 3000K warm white LED strips mounted on aluminum channels for heat dissipation. Place a layer of diffusion material like frosted acrylic between the LEDs and your map to eliminate hot spots and ensure even light distribution. Wire your lighting system with dimmer controls so you can adjust the intensity based on room lighting conditions and desired ambiance.
Control these 100ft RGB LED strip lights via Bluetooth app or remote to customize colors and brightness. Sync them to music for a dynamic party atmosphere and set timers for automatic on/off.

Make Panels Mobile With Caster Wheels
Move heavy items with ease using these durable 2" caster wheels. The set of four heavy-duty swivel casters with double brakes supports up to 450 lbs and features quiet, non-marking polyurethane wheels.
Attach heavy-duty swivel casters to create portable room dividers that adapt to changing space requirements. You’ll need locking wheels rated for at least 150 pounds per panel to prevent unwanted movement during use. Install casters using reinforced mounting plates welded to your aluminum frame structure rather than simple bolt-on attachments. Choose wheels with soft rubber treads to protect flooring surfaces while ensuring smooth rolling action across various floor types including hardwood and tile.
Move heavy items with ease using these durable 3-inch swivel casters. The set of four locking wheels supports up to 1600 lbs and features quiet, wear-resistant polyurethane construction.

Transform Maps Into Functional Furniture Pieces
You can extend your oversized map’s utility beyond traditional wall displays by integrating them into custom furniture pieces. This approach maximizes your space while creating conversation-worthy functional elements.
Create Custom Tabletops With Map Surfaces
Mount your oversized map under tempered glass to create a stunning dining or conference table surface. Cut your map to fit standard table dimensions, typically 72″ x 36″ for dining tables or 96″ x 42″ for conference settings. Apply conservation-grade mounting adhesive to secure the map to a plywood base, then install ¼-inch tempered glass with polished edges for protection. You’ll need edge banding or metal trim to finish the perimeter and prevent moisture damage. This technique works exceptionally well with topographic or nautical charts that feature rich detail and color variations.
Design Map-Covered Storage Solutions
Transform storage cabinets and bookcases by applying map sections as decorative surfaces using decoupage techniques. Cut your oversized map into geometric panels that match your furniture dimensions, typically 12″ x 18″ sections for standard cabinet doors. Use archival-quality adhesive and multiple thin coats of polyurethane finish to protect the map surface from daily use. Consider backlit storage units where LED strips behind translucent map sections create ambient lighting. File cabinets, media consoles, and built-in shelving units work particularly well for this application.
Build Map Display Easels for Rotation
Construct adjustable easels that accommodate different map sections for seasonal or thematic rotation displays. Build your easel frame using 2″ x 2″ hardwood with adjustable brackets that hold maps ranging from 24″ x 36″ to 60″ x 48″. Install spring-loaded clips or magnetic strips along the frame edges to secure map corners without causing damage. Add caster wheels to the base for mobility between rooms, and include a storage shelf beneath for rolled map sections. This system lets you showcase different geographic regions or historical periods throughout the year.
Develop Interactive Display Systems
Transform your oversized map from a static display into an engaging interactive experience that invites exploration and learning.
Install Track Lighting for Focused Illumination
Position adjustable track lighting systems along the map’s perimeter to eliminate shadows and highlight specific geographic regions. Use LED track heads with 3000K color temperature to provide consistent illumination without causing UV damage to map materials. Install dimmer controls to adjust lighting intensity based on viewing conditions and create dramatic effects during presentations. Mount tracks 6-8 feet from the wall surface to achieve optimal light distribution across the entire map area.
Add Digital Elements for Enhanced Information
Integrate small digital displays or tablets mounted near key map regions to provide additional context and real-time information. Connect QR codes to specific map locations that link to online databases with updated geographic data, historical information, or multimedia content. Install proximity sensors that trigger digital overlays when viewers approach certain areas, displaying population statistics, climate data, or historical events. Use wireless connectivity to update content remotely and maintain current information without physically altering the map display.
Create Touch-Friendly Reference Points
Install discrete tactile markers at major cities, landmarks, and points of interest using raised metal pins or magnetic indicators. Design removable overlay systems with clear acrylic sheets that allow you to mark routes, highlight regions, or add temporary annotations using dry-erase markers. Position ergonomic pointer tools on retractable cables near the display for guided presentations and detailed exploration. Create standardized symbol legends using removable magnetic elements that correspond to different geographic features or data categories.
Incorporate Maps Into Architectural Elements
Transform your oversized maps from wall decorations into permanent architectural features. This approach integrates cartographic displays directly into your space’s structural design.
Wrap Columns and Structural Features
Wrap cylindrical columns with continuous map sections to create 360-degree geographic displays. Cut oversized maps into vertical strips that follow meridian lines, maintaining geographic accuracy while accommodating the column’s circumference. Use architectural adhesive rated for permanent installation and apply anti-UV lamination to protect against fading. Position seams along natural boundaries like coastlines or political borders to minimize visual disruption.
Install Maps in Recessed Wall Niches
Create custom wall recesses during construction or renovation to house your oversized maps as built-in displays. Frame the niche with LED strip lighting around the perimeter for even illumination without shadows. Mount maps on rigid backing boards cut to fit precisely within the recess dimensions. Add tempered glass covers to protect the maps from dust and humidity while maintaining accessibility for occasional cleaning.
Use Maps as Ceiling Installations
Mount oversized maps directly to ceiling surfaces using mechanical fastening systems designed for overhead applications. Install track lighting parallel to major geographic features to eliminate shadows and highlight topographic details. Consider acoustic panels with map overlays for dual functionality in conference rooms or educational spaces. Use lightweight mounting materials like aluminum honeycomb boards to reduce structural load while maintaining map flatness.
Design Layered Mixed-Media Presentations
You’ll create dynamic visual storytelling when you combine multiple display elements with your oversized maps. This technique transforms flat cartographic displays into immersive experiences that engage viewers on multiple levels.
Combine Maps With Photography and Artwork
Layer historical photographs directly over corresponding geographic locations on your oversized maps using clear acrylic standoffs. Mount vintage travel posters, architectural drawings, or cultural artwork adjacent to specific regions to create narrative connections. You’ll achieve visual depth by positioning smaller framed pieces at varying distances from the map surface, creating a 3D storytelling effect that guides viewers through both geographic and cultural journeys.
Add Three-Dimensional Geographic Elements
Incorporate relief models, topographic sculptures, or scaled architectural replicas that correspond to locations on your flat map display. Mount compass roses, vintage navigation instruments, or ship models using museum-quality brackets to extend beyond the map surface. You’ll create tactile interest by adding textured materials like rope borders for coastal areas or fabric elements representing different terrain types, making the geography physically engaging for viewers.
Create Thematic Collections by Region or Era
Group your oversized maps with period-appropriate artifacts, currency, stamps, or documents from the same geographic regions or time periods. Display exploration tools, vintage guidebooks, or cultural objects in shadow boxes positioned strategically around your map installation. You’ll build comprehensive historical narratives by coordinating color schemes and materials across all display elements, ensuring each thematic collection tells a cohesive story about specific places and times.
Conclusion
These seven creative layout techniques transform your oversized maps from storage burdens into captivating design elements that elevate any space. Whether you choose gallery walls or interactive displays each method maximizes both visual impact and functionality.
Your oversized maps deserve more than being rolled up in a closet. With proper planning and the right techniques you’ll create stunning displays that serve as conversation starters educational tools and architectural features all in one.
Start with one technique that matches your space and skill level then expand your display as you gain confidence. Your maps will finally get the showcase they deserve while adding character and sophistication to your environment.
Frequently Asked Questions
What makes standard framing inadequate for oversized maps?
Standard framing methods can’t accommodate the large dimensions of oversized maps, which often exceed typical frame sizes. These maps require specialized mounting techniques and custom solutions to properly display their full scope and detail without compromising their visual impact or structural integrity.
How can I create a gallery wall with an oversized map?
Divide your oversized map into multiple sections and frame each piece individually using consistent matting and frame styles. Arrange the sections according to their geographic relationships to maintain spatial accuracy and visual flow, creating a cohesive gallery wall that preserves the map’s educational value.
What are the best mounting techniques for floor-to-ceiling map displays?
Use high-quality adhesive systems and conservation-grade mounting methods to attach maps directly to wall surfaces. Ensure precise alignment for seamless edge-to-edge installation, and consider professional installation to maintain the map’s geographic integrity while creating a dramatic architectural feature.
Can oversized maps be used as room dividers?
Yes, you can create functional room dividers using lightweight panel frameworks with aluminum channel rails and honeycomb panels. Mount map sections on these panels and add caster wheels for mobility. Consider LED backlighting for dramatic effect in open floor plans.
How can I turn my oversized map into functional furniture?
Transform maps into custom tabletops by mounting them under tempered glass for dining or conference tables. You can also apply map sections to cabinets and bookcases using decoupage techniques, or build adjustable easels for rotating displays and seasonal showcases.
What lighting works best for oversized map displays?
Install adjustable track lighting to eliminate shadows and highlight specific regions. Use LED lights to prevent UV damage to the maps. Position lights at multiple angles to ensure even illumination across the entire surface without creating glare or hotspots.
How can I make my map display interactive?
Add digital elements like small displays or QR codes linking to online databases for enhanced educational value. Include tactile markers and removable overlays to encourage exploration. Consider touch-friendly reference points that allow viewers to engage with specific geographic locations.
What are some architectural integration options for oversized maps?
Wrap cylindrical columns with continuous map sections for 360-degree displays, install maps in recessed wall niches with LED lighting, or create ceiling installations using mechanical fastening systems. These methods integrate maps into the structural design while maintaining functionality.
How do I create mixed-media presentations with oversized maps?
Layer historical photographs over corresponding map locations and incorporate relief models or textured materials for physical engagement. Combine maps with period-appropriate artifacts and cultural objects to create thematic collections that tell cohesive stories about specific places and times.
What conservation considerations should I keep in mind?
Use conservation-grade materials and UV-protective lighting to prevent fading and deterioration. Avoid direct sunlight exposure and maintain stable temperature and humidity levels. When mounting, use acid-free materials and reversible adhesives to preserve the map’s long-term condition.