7 Ways to Improve Spatial Resolution That Transform Digital Maps
Why it matters: You’re missing critical details in your imaging data when spatial resolution falls short — and that directly impacts your decision-making across industries from medical diagnostics to satellite mapping.
The big picture: Spatial resolution determines how much fine detail you can capture and analyze in any image-based system, making it a fundamental factor in everything from identifying tumors in MRI scans to tracking climate change from space.
What’s ahead: We’ll break down seven game-changing implications that show exactly how improving your spatial resolution transforms data quality, analytical capabilities, and ultimately your results — whether you’re working with microscopy, remote sensing, or digital photography.
Disclosure: As an Amazon Associate, this site earns from qualifying purchases. Thank you!
P.S. check out Udemy’s GIS, Mapping & Remote Sensing courses on sale here…
Understanding Spatial Resolution and Its Critical Role in Modern Technology
Spatial resolution determines how much detail you can capture and analyze in your digital imaging systems. It’s the foundation that separates professional-grade results from amateur attempts across industries.
Achieve a flawless, even complexion with e.l.f. Flawless Satin Foundation. This lightweight, vegan formula provides medium coverage and a semi-matte finish for all-day wear, while hydrating your skin with glycerin.

Defining Spatial Resolution in Digital Systems
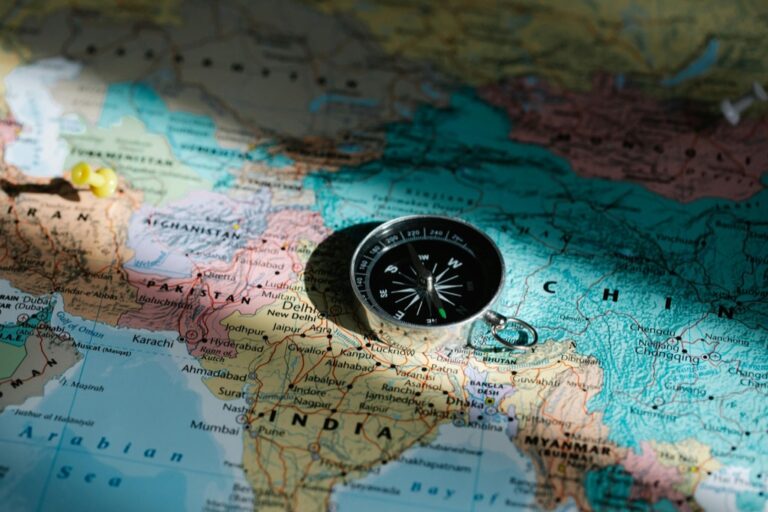
Spatial resolution measures the smallest distinguishable detail in an image, typically expressed as pixels per inch (PPI) or ground sample distance (GSD). You’ll find it represents the physical size of each pixel in your captured data. Higher spatial resolution means smaller pixels and finer detail capture. For example, a 1-meter resolution satellite image shows objects 1 meter or larger, while 10-centimeter resolution reveals much smaller features. Professional mapping systems require specific resolution thresholds to meet accuracy standards.
The Relationship Between Pixel Density and Image Quality
Pixel density directly impacts your image’s ability to preserve critical information and maintain clarity during analysis. You’ll notice that doubling pixel density quadruples the total information captured in your image. Higher density reduces pixelation artifacts and improves edge definition in your spatial data. However, increased density also means larger file sizes and greater processing requirements. The sweet spot depends on your specific application – medical imaging might need 300 DPI while web mapping works fine at 72 DPI.
Industry Applications Where Spatial Resolution Matters Most
Medical imaging relies on high spatial resolution to detect tumors, fractures, and tissue abnormalities that could save lives. You’ll find satellite mapping uses varying resolutions – from 30-meter Landsat imagery for climate monitoring to 30-centimeter commercial imagery for urban planning. Archaeological surveys need sub-meter resolution to identify buried structures and artifacts. Autonomous vehicles require real-time spatial processing at resolutions fine enough to distinguish pedestrians from traffic signs. Manufacturing inspection systems use microscopic resolution to detect defects in semiconductor chips and precision components.
Upgrading Hardware Components for Enhanced Spatial Resolution
Your hardware choices directly determine the maximum spatial resolution you can achieve in your imaging systems. Strategic hardware upgrades create measurable improvements in detail capture and data precision across mapping applications.
Investing in High-Resolution Sensors and Cameras
High-resolution sensors capture finer spatial details by increasing pixel density and improving light sensitivity. Modern CMOS sensors with 50+ megapixels provide ground sample distances below 2cm for aerial mapping missions. You’ll achieve optimal results with sensors featuring larger pixel sizes (5-7 micrometers) that reduce noise while maintaining resolution. Professional cameras like the Phase One iXM-100 deliver 100-megapixel images with exceptional dynamic range. Consider full-frame sensors over crop sensors to maximize your field of view and spatial accuracy.
Optimizing Display Technologies and Monitor Specifications
Display technology quality affects your ability to accurately interpret spatial data during analysis and editing workflows. 4K monitors with 3840×2160 resolution provide pixel densities of 163 PPI on 27-inch screens, enabling precise detail examination. You need monitors with 99% sRGB color accuracy and Delta E values below 2 for reliable color reproduction in satellite imagery. IPS panels offer consistent viewing angles essential for collaborative mapping sessions. Professional displays like the EIZO ColorEdge series include hardware calibration for maintaining color accuracy over time.
Selecting Advanced Processing Units for Better Performance
Advanced processing units accelerate high-resolution image processing and enable real-time analysis of large datasets. GPUs with 16+ GB VRAM handle 100+ megapixel images efficiently during orthorectification and mosaicking operations. You’ll reduce processing times by 70-80% using CUDA-enabled graphics cards for photogrammetry software like Pix4D or Agisoft Metashape. Multi-core CPUs with 32+ threads optimize batch processing workflows for large mapping projects. NVMe SSDs with read speeds exceeding 3,500 MB/s eliminate bottlenecks when working with multi-gigabyte image files.
Learn close-range photogrammetry and 3D imaging techniques. This textbook provides comprehensive coverage of the subject.

Implementing Advanced Image Processing Techniques
Software-based processing techniques offer powerful alternatives to hardware upgrades when improving spatial resolution. These computational methods can enhance existing imagery while optimizing your mapping workflow efficiency.
Utilizing Super-Resolution Algorithms and AI Enhancement
Super-resolution algorithms multiply your image resolution by 2x to 8x while preserving critical mapping details. Deep learning models like ESRGAN and Real-ESRGAN excel at reconstructing high-frequency features from low-resolution satellite imagery and aerial photographs.
You’ll achieve optimal results using specialized software such as Topaz Gigapixel AI or open-source implementations like EDSR. These tools reconstruct fine details in terrain features, building edges, and vegetation boundaries that traditional upscaling methods often blur or distort.
Applying Interpolation Methods for Pixel Upscaling
Interpolation techniques provide fundamental pixel upscaling through mathematical algorithms that estimate missing pixel values. Bicubic and Lanczos interpolation methods offer superior performance for cartographic applications compared to basic bilinear approaches.
You’ll find bicubic interpolation particularly effective for preserving smooth gradients in elevation data and contour lines. Advanced methods like edge-directed interpolation maintain sharp boundaries between different land cover types while minimizing artifacts that compromise mapping accuracy.
Leveraging Machine Learning for Automatic Image Improvement
Machine learning algorithms automatically detect and enhance specific mapping features through pattern recognition and contextual analysis. Convolutional neural networks trained on geographic datasets can intelligently sharpen roads, enhance water body boundaries, and clarify urban infrastructure details.
You can implement pre-trained models through platforms like Google Earth Engine or develop custom solutions using TensorFlow and PyTorch frameworks. These automated systems consistently improve feature detection accuracy while reducing manual processing time for large-scale mapping projects.
Optimizing Software Settings and Configuration Parameters
Software optimization becomes critical when hardware upgrades aren’t feasible or when you need maximum performance from existing equipment. Professional mapping applications offer numerous configuration options that directly impact spatial resolution output.
Adjusting Resolution Settings in Professional Applications
Configure your GIS software to output at maximum native resolution by accessing the display properties and setting pixel dimensions to match your data requirements. ArcGIS Pro allows you to adjust map frame properties to 600 DPI for high-quality cartographic output, while QGIS enables resolution settings up to 1200 DPI through the print composer. Set your workspace coordinate system to match your data’s native projection to prevent resolution degradation during reprojection processes.
Configuring Sampling Rates for Data Acquisition Systems
Optimize data collection by setting sampling rates that match your spatial resolution requirements without creating excessive file sizes. Configure GPS units to record points every 1-3 meters for detailed trail mapping, or adjust LiDAR systems to capture 10-20 points per square meter for topographic surveys. Remote sensing platforms benefit from configuring spectral band combinations and temporal sampling intervals that preserve critical ground features while maintaining manageable data volumes.
Fine-Tuning Compression Settings to Preserve Detail
Balance file size with image quality by selecting appropriate compression algorithms for different data types. Use lossless compression formats like TIFF-LZW for elevation data and scientific imagery where every pixel value matters. JPEG compression works effectively for aerial photography at 85-95% quality settings, preserving visual detail while reducing storage requirements. Configure PNG compression for categorical data and vector graphics where sharp edges and color accuracy are essential for proper cartographic representation.
Addressing Environmental Factors That Impact Resolution Quality
Environmental conditions significantly affect your mapping system’s ability to capture high-resolution spatial data. Understanding how to control these factors ensures consistent image quality across different field conditions.
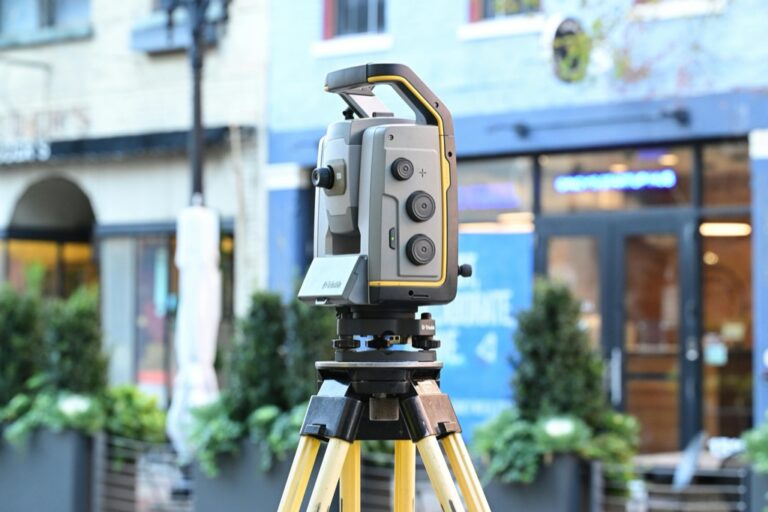
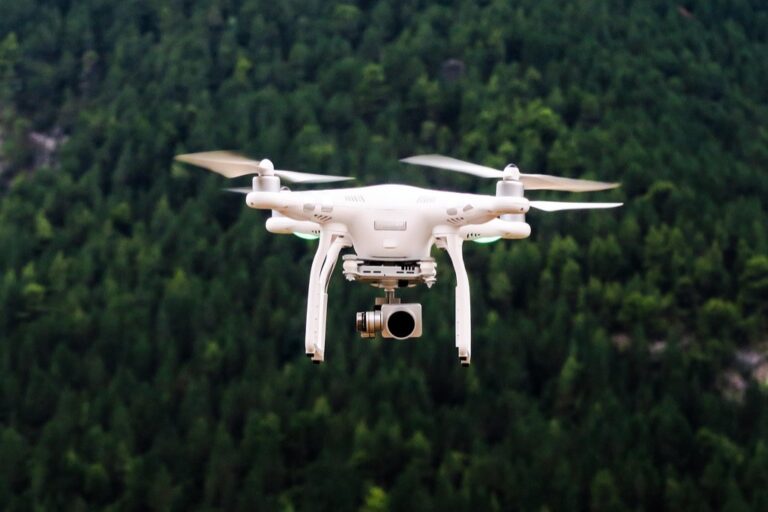
Minimizing Motion Blur and Stabilization Issues
Implement mechanical stabilization systems for drone-mounted cameras during aerial surveys to eliminate vibration-induced blur. Use gimbal stabilizers with 3-axis compensation for smooth footage at low altitudes. Set faster shutter speeds above 1/500th second when capturing moving targets or operating from unstable platforms. Deploy tripod systems with weighted bases for ground-based surveying equipment to prevent wind-induced movement. Configure anti-vibration mounts for vehicle-mounted sensors during mobile mapping operations to maintain sharp imagery.
Controlling Lighting Conditions and Exposure Settings
Schedule data collection during optimal lighting windows between 10 AM and 2 PM for consistent solar illumination. Use polarizing filters on camera lenses to reduce glare from water surfaces and wet pavement in urban mapping. Adjust ISO settings between 100-400 to minimize noise while maintaining adequate exposure for detail capture. Deploy auxiliary lighting systems like LED panels for indoor facility mapping or underground infrastructure surveys. Configure automatic exposure bracketing to capture multiple exposures for HDR processing in challenging lighting conditions.
Enhance colors and reduce reflections with the K&F Concept 67mm Circular Polarizer Filter. Its ultra-slim frame prevents vignetting, while multi-coated Japanese AGC glass ensures optimal image quality.

Reducing Noise Through Proper Shielding and Filtering
Install electromagnetic shielding around sensitive sensors to prevent interference from power lines and radio transmissions during data acquisition. Use low-pass filters in signal processing chains to eliminate high-frequency noise from environmental sources. Apply proper grounding techniques for all electronic equipment to reduce electrical noise in captured imagery. Select appropriate cable shielding for data transmission lines to prevent signal degradation over long distances. Implement software-based noise reduction using algorithms like bilateral filtering to clean acquired data while preserving edge detail.
Balancing Performance Trade-offs and System Resources
Managing high-resolution spatial data requires careful consideration of system limitations and performance requirements. You’ll need to optimize multiple factors simultaneously to achieve the best results for your mapping projects.
Managing File Sizes and Storage Requirements
High-resolution imagery creates exponentially larger files that strain storage systems and transfer protocols. A single 50-megapixel orthophoto can exceed 500MB in uncompressed format, while 4K drone footage generates 375MB per minute of recording.
You’ll need enterprise-grade storage solutions with RAID configurations for redundancy. Consider implementing tiered storage systems where active projects use SSD arrays while archived data moves to high-capacity HDDs. Cloud storage services like AWS S3 or Google Cloud provide scalable options for large mapping datasets.
Safeguard your data with the SanDisk Professional 16TB G-RAID Mirror. This dual-bay array automatically duplicates your files for redundancy and features Thunderbolt 3 for fast transfers, plus includes a PRO-BLADE SSD Mag 1TB for expanded workflow options.

Optimizing Processing Speed Versus Resolution Quality
Processing times increase dramatically with higher spatial resolution, creating bottlenecks in production workflows. Photogrammetry processing that takes 2 hours at standard resolution can require 12+ hours for ultra-high resolution datasets.
You should implement GPU acceleration for computationally intensive tasks like orthorectification and feature extraction. Modern workstations with RTX 4090 graphics cards can reduce processing times by 70% compared to CPU-only workflows. Consider distributed processing across multiple machines for time-critical projects while maintaining quality standards.
Stay organized with this 48-inch workbench featuring drawers, shelves, and a pegboard. The enamel-coated work surface supports up to 220 pounds and includes built-in power outlets and a fluorescent light.
Considering Bandwidth Limitations in Real-Time Applications
Network bandwidth becomes critical when transmitting high-resolution spatial data for real-time applications like emergency response mapping or autonomous vehicle navigation. Standard 4G connections can’t support continuous streaming of high-resolution imagery.
You’ll need dedicated fiber connections or 5G networks for real-time high-resolution data transmission. Implement adaptive compression algorithms that automatically adjust resolution based on available bandwidth. Edge computing solutions can process data locally before transmission, reducing bandwidth requirements while maintaining spatial accuracy for critical applications.
Measuring and Validating Spatial Resolution Improvements
You need quantifiable methods to verify your spatial resolution enhancements deliver measurable improvements across your mapping projects.
Using Standardized Testing Methods and Benchmarks
Use resolution test charts like the USAF 1951 target or Siemens star patterns to establish baseline measurements for your imaging systems. These standardized targets provide precise line-pair measurements that translate directly to spatial resolution values in your mapping applications.
Implement ground sample distance (GSD) calculations for aerial and satellite imagery validation. Calculate GSD by dividing sensor pixel size by focal length, then multiply by flight altitude to determine actual ground resolution in centimeters per pixel for your specific mapping scenarios.
Implementing Quality Assessment Metrics
Apply the Modulation Transfer Function (MTF) to measure your system’s ability to reproduce spatial frequencies accurately. MTF values above 0.5 at the Nyquist frequency indicate acceptable spatial resolution performance for most cartographic applications requiring detailed feature identification.
Calculate signal-to-noise ratio (SNR) measurements across different resolution settings to ensure enhanced spatial detail doesn’t compromise data quality. Maintain SNR values above 20:1 for professional mapping work, particularly when processing multispectral datasets for land cover classification projects.
Conducting Comparative Analysis Before and After Enhancements
Create split-screen comparisons using identical geographic areas captured at different resolution settings to demonstrate measurable improvements in feature detectability. Document specific improvements in identifying roads, buildings, and vegetation boundaries that weren’t visible in lower-resolution versions.
Generate statistical reports comparing edge sharpness measurements, contrast ratios, and detail preservation metrics between original and enhanced datasets. Use histogram analysis and frequency domain measurements to quantify the actual spatial information gain achieved through your resolution improvement techniques.
Conclusion
Improving spatial resolution transforms your imaging capabilities across professional applications. Whether you’re working in medical diagnostics satellite mapping or manufacturing inspection the strategies outlined here will enhance your data quality and analytical precision.
You’ll need to balance hardware investments with software optimization techniques while considering environmental factors that impact performance. The key lies in understanding your specific requirements and implementing solutions that maximize resolution without overwhelming your system resources.
Remember that measuring your improvements through standardized testing validates your investment. By following these seven implications you’ll capture finer details make more informed decisions and achieve better results in your imaging projects.
Frequently Asked Questions
What is spatial resolution in imaging?
Spatial resolution refers to the smallest distinguishable detail in an image, typically measured in pixels per inch (PPI) or ground sample distance (GSD). It determines how fine the details that can be captured and displayed in an image are. Higher spatial resolution allows for capturing finer details, which is crucial for applications like medical imaging, satellite mapping, and digital photography.
Why is spatial resolution important for decision-making?
Inadequate spatial resolution can lead to missing critical details that significantly affect decision-making across various fields. For example, in medical diagnostics, insufficient resolution might cause doctors to miss small tumors in MRI scans. In satellite mapping, poor resolution can hinder accurate climate monitoring and urban planning efforts, potentially leading to flawed analysis and incorrect conclusions.
How does pixel density affect image quality?
Higher pixel density enhances image clarity and detail capture, allowing for more precise visualization of fine features. However, increased pixel density also results in larger file sizes and greater processing demands. This creates a trade-off between image quality and system resource requirements, requiring careful balance based on specific application needs and available computing power.
What hardware upgrades improve spatial resolution?
Key hardware upgrades include investing in high-resolution sensors and cameras with modern CMOS sensors exceeding 50 megapixels, optimizing display technologies with 4K monitors featuring high pixel densities, and implementing advanced processing units like GPUs and multi-core CPUs. These upgrades work together to capture, display, and process high-resolution imagery more effectively across various applications.
Can software enhance spatial resolution without hardware upgrades?
Yes, advanced software techniques can significantly improve spatial resolution. Super-resolution algorithms and AI enhancement tools like Topaz Gigapixel AI can multiply image resolution by 2x to 8x while preserving critical details. Machine learning algorithms, interpolation methods, and optimized processing settings provide powerful alternatives to expensive hardware upgrades for many applications.
What environmental factors affect resolution quality?
Key environmental factors include motion blur from unstable platforms, lighting conditions, and electronic noise. These can be controlled through mechanical stabilization systems for cameras, scheduling data collection during optimal lighting conditions, using polarizing filters, and implementing proper shielding and filtering techniques. Managing these factors ensures consistent high-resolution data capture across various field conditions.
How do you measure spatial resolution improvements?
Spatial resolution improvements can be measured using standardized testing methods like resolution test charts and ground sample distance calculations. Quality assessment metrics such as Modulation Transfer Function (MTF) and signal-to-noise ratio (SNR) help ensure enhancements don’t compromise data quality. Comparative analyses including split-screen comparisons and statistical reports document measurable improvements in feature detectability.