7 Ideas for Combining Multiple Projections Creatively That Transform Spaces
You’ve mastered single projection mapping but now you’re ready to push creative boundaries with multi-projection setups. Why it matters: Combining multiple projectors unlocks immersive experiences that single units simply can’t achieve â from wraparound visuals to interactive installations that respond to audience movement. The bottom line: Strategic projection layering transforms ordinary spaces into extraordinary visual experiences that captivate audiences and elevate your creative work.
Disclosure: As an Amazon Associate, this site earns from qualifying purchases. Thank you!
Create Immersive 360-Degree Environments With Circular Projection Arrays
Circular projection arrays transform traditional flat displays into complete environmental experiences. You’ll surround viewers with continuous visual content that eliminates the boundaries between screen and space.
Position Multiple Projectors in Strategic Angles
Enjoy immersive entertainment anywhere with this portable 1080P HD projector. It features Bluetooth 5.1 for seamless audio connectivity and includes a convenient projector screen for easy setup.

Position your projectors at equal angular intervals around your target space to achieve optimal coverage. Calculate the exact placement by dividing 360 degrees by your projector count – for example, six projectors require 60-degree spacing. Mount each unit at consistent distances from the center point to maintain uniform brightness and resolution across the entire viewing area. Test sightlines from multiple viewer positions to ensure no dead zones or projection shadows interrupt the immersive experience.
P.S. check out Udemy’s GIS, Mapping & Remote Sensing courses on sale here…
Blend Edge Overlap for Seamless Visual Flow
Blend overlapping projection edges using geometric correction software to create smooth visual transitions. Set each projector to overlap its neighbors by 10-15% of the image width for optimal blending results. Use masking tools to create precise feathering zones where projections meet, adjusting opacity curves to eliminate visible seams. Fine-tune color temperature and brightness levels across all units to maintain consistent visual quality throughout the circular display environment.
Synchronize Content Across All Projection Sources
Synchronize your content using media servers or dedicated projection mapping software that supports multi-output configurations. Configure frame-accurate timing to prevent visual lag between adjacent projectors that could break the immersive illusion. Use genlock or timecode synchronization for professional installations requiring precise coordination. Test your synchronization setup with high-motion content to identify any timing discrepancies that need adjustment before your final presentation.
Layer Depth and Dimension Through Front and Rear Projection Techniques
Building on circular projection arrays, you can create compelling visual depth by combining front and rear projection methods that layer multiple visual planes within a single space.
Combine Transparent Screens for Multi-Layered Effects
Position transparent screens at different distances to create distinct visual layers that viewers can see simultaneously. You’ll achieve depth by projecting different content onto each screen from behind while maintaining visibility through to background layers. Professional venues often use 3-4 transparent screens spaced 2-3 feet apart for maximum depth perception. This technique works exceptionally well for storytelling where foreground characters interact with background environments.
Create Floating Holographic-Style Displays
Project onto invisible surfaces like fine mist, specialized mesh, or transparent film to create floating imagery that appears suspended in mid-air. You’ll need high-contrast content with dark backgrounds to maximize the holographic effect while positioning projectors at precise angles to minimize visible light paths. Museums and retail spaces frequently use this technique with 4000+ lumen projectors for daylight visibility and specialized fog machines for consistent projection surfaces.
Create vibrant atmospheres with this 500W fog machine. It produces 2000 CFM of fog and features 13 colorful LED lights, controlled via wireless remotes, for dynamic stage and party effects.

Balance Brightness Levels for Optimal Visual Impact
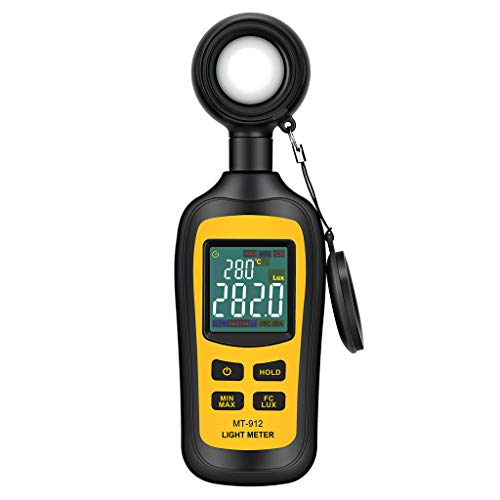
Calibrate your projector output to ensure front projections don’t overpower rear-projected layers while maintaining clear visibility of all visual elements. You’ll want to set your primary content at 80-100% brightness while reducing secondary layers to 40-60% intensity for proper visual hierarchy. Professional installations typically use light meters to measure each layer’s luminance and adjust accordingly for consistent viewing experiences across different ambient lighting conditions.
Accurately measure light levels up to 200,000 Lux and ambient temperature with this handheld meter. Features a clear color LCD screen, min/max readings, and data hold for convenient use in various settings.
Map Projections Onto Irregular Surfaces and Architectural Elements
Moving beyond flat surfaces opens up extraordinary possibilities for creative projection mapping. Irregular surfaces and architectural elements transform ordinary spaces into captivating visual experiences.
Transform Building Facades Into Dynamic Canvases
Map your building’s architectural details using specialized software like TouchDesigner or MadMapper to create precise surface meshes. These tools analyze window frames, doorways, and structural elements to generate accurate projection maps.
Position multiple projectors at strategic angles to cover complex facade geometries without creating harsh shadows. You’ll need at least 4,000 lumens per projector for outdoor installations to compete with ambient lighting.
Synchronize content timing across all projection sources to create seamless animations that flow naturally around architectural features.
Project Onto Curved Walls and Sculptural Forms
Utilize projection mapping software with advanced warping capabilities to conform visuals to curved surfaces. Resolume Arena and Disguise systems excel at handling complex geometric transformations for sculptural installations.
Install projectors perpendicular to curved surface sections whenever possible to minimize distortion. You’ll achieve better image quality by using shorter throw distances and higher resolution projectors.
Create custom content that emphasizes the three-dimensional nature of curved forms rather than fighting against the surface geometry.
Align Multiple Projectors for Complex Geometry Coverage
Establish reference points on your target surfaces using laser measuring tools or photogrammetry to create accurate 3D models for projection alignment. This ensures pixel-perfect registration across multiple projector outputs.
Get accurate distance measurements up to 100 feet with the Bosch GLM100-23 laser measure. Its simple two-button operation and backlit display make measuring easy, even in dark areas.

Use professional calibration tools like Christie Pandoras Box or Dataton WATCHOUT to manage complex multi-projector setups. These systems handle geometric correction and edge blending automatically.
Enjoy 42,000+ classic games with the Pandora Box arcade console. Simply plug and play on your TV with 4K HDMI output and experience smoother gameplay thanks to the upgraded processor and 256GB memory.

Test projection overlap zones carefully to maintain consistent brightness levels across surface transitions. You’ll need 15-20% overlap between adjacent projectors for seamless blending.
Synchronize Multiple Projectors for Large-Scale Video Walls
Large-scale video walls require precise synchronization across multiple projection units to create seamless visual experiences. You’ll need dedicated hardware and software systems to manage timing, color accuracy, and content distribution effectively.
Configure Grid Layouts for Massive Display Areas
Configure your projector grid using professional edge-blending processors like Dataton WATCHOUT or 7thSense Delta systems. Position projectors in precise rows and columns, maintaining consistent throw distances of 1.2-1.5 times the screen width. Calculate overlap zones of 10-15% between adjacent projectors for seamless blending. Use laser alignment tools to ensure pixel-perfect registration across your entire display matrix. Professional installations typically employ 4×3 or 6×2 grid configurations for optimal viewing angles.
Ensure Color Consistency Across All Projection Units
Calibrate each projector individually using colorimeters like X-Rite i1Display Pro or Klein K-10A meters. Match white points to D65 standard (6500K) and gamma curves to 2.2 across all units. Create custom color profiles for each projector to compensate for lamp aging and manufacturing variations. Use test patterns with pure white, black, and primary color fields to verify consistency. Professional systems require recalibration every 100-200 operating hours to maintain uniform appearance.
Manage Content Distribution and Playback Timing
Deploy media servers like disguise or Green Hippo systems to distribute synchronized content across multiple projectors. Configure genlock signals to ensure frame-accurate playback timing within 1/60th of a second. Use redundant network connections and backup media servers to prevent system failures during critical presentations. Encode content at native resolution for each projection zone to minimize processing delays. Test your entire signal chain with complex motion graphics to verify smooth playback performance.
Blend Interactive Elements With Multi-Projection Setups
Interactive multi-projection systems transform passive viewing into dynamic engagement experiences. You’ll create responsive environments that adapt to audience behavior through sensor integration and real-time content generation.
Incorporate Motion Sensors and Touch-Responsive Surfaces
Protect your property with this wireless driveway alarm system. It features a long 1/2-mile range and a motion sensor that detects movement up to 50 feet away, reducing false alarms.

Motion sensors like PIR detectors and LiDAR systems track audience movement across projection zones, triggering specific visual responses. You’ll position infrared sensors at strategic points to detect gesture recognition, while capacitive touch surfaces overlay projection areas for direct interaction. Install motion tracking cameras above the projection space to capture full-body movements and translate them into visual effects across multiple screens simultaneously.
Create Audience-Triggered Visual Experiences
Audience-triggered systems use proximity sensors to activate different projection layers as viewers approach specific zones. You’ll program content that responds to crowd density, changing color palettes and animation speed based on the number of people present. Set up pressure-sensitive floor panels beneath projection areas to trigger immersive visual storms, particle effects, or architectural transformations that span across multiple projector outputs for maximum impact.
Design Real-Time Content That Responds to User Input
Real-time content systems process user input through computer vision algorithms and translate actions into immediate visual feedback. You’ll use software like TouchDesigner or Max/MSP to create responsive content that adapts projection intensity, color temperature, and animation patterns based on voice levels, movement speed, or gesture recognition. Connect multiple projectors to a central processing unit that distributes synchronized interactive content across all surfaces within milliseconds.
Combine Different Projection Technologies for Unique Effects
Mixing different projection technologies creates distinctive visual characteristics that single-technology setups can’t achieve. Each projector type brings unique strengths to your multi-projection design.
Mix Standard LCD Projectors With LED and Laser Units
Combine LCD projectors with LED units to create contrast variations across your installation. LCD projectors deliver deep blacks and rich colors for detailed imagery while LED projectors provide consistent brightness and instant on/off capabilities. Pair laser projectors with LCD units for installations requiring both high brightness outdoor sections and color-accurate indoor displays. Position LCD projectors for close-up detailed work and laser units for long-distance projection needs. This combination maximizes each technology’s strengths while creating dynamic visual textures.
Integrate Short-Throw and Long-Throw Projectors
Deploy short-throw projectors for intimate audience interactions and long-throw units for expansive background visuals. Short-throw projectors eliminate shadow interference when viewers move near projection surfaces while long-throw projectors cover large architectural features. Configure short-throw units at 3-6 feet from surfaces and long-throw projectors at 15-30 feet for optimal coverage ratios. Synchronize both projection types to create layered depth where foreground interactive elements complement distant atmospheric visuals. This setup prevents audience shadows while maintaining large-scale impact.
Experiment With Various Resolution and Aspect Ratios
Match 4K projectors with HD units strategically based on viewing distances and content detail requirements. High-resolution projectors handle close-up text and intricate graphics while standard resolution units manage ambient backgrounds effectively. Combine ultra-wide aspect ratios like 21:9 with standard 16:9 projections to create panoramic scenes with detailed focal points. Blend vertical portrait projections with horizontal landscape formats for architectural installations spanning multiple wall orientations. Calculate pixel density requirements ensuring each projector’s resolution matches its intended viewing distance and content complexity.
Design Narrative Experiences Through Sequential Projection Storytelling
Sequential projection storytelling transforms multiple projectors into chapters of an unfolding visual narrative. You’ll create compelling experiences by guiding audiences through carefully orchestrated projection zones that reveal stories progressively.
Guide Viewers Through Multiple Projection Zones
Direct audience flow using strategically positioned projectors that activate in sequence. You’ll create natural pathways by timing projections to illuminate specific areas as viewers approach them. Position motion sensors at key transition points to trigger the next projection zone automatically. Use lighting cues and subtle visual elements like arrows or footsteps to guide movement between displays. Configure projection brightness to gradually fade from one zone while brightening the next, creating seamless transitions that prevent audience confusion.
Create Transitions Between Different Projected Scenes
Design smooth scene changes using crossfade techniques and synchronized timing controls. You’ll need professional media servers like Watchout or Resolume Arena to manage complex transition sequences across multiple projectors. Program overlapping content that bridges scenes thematically, using common visual elements like colors or shapes that carry between displays. Set fade durations between 2-4 seconds for optimal viewer comprehension. Incorporate audio cues that complement visual transitions, helping audiences anticipate scene changes while maintaining narrative continuity throughout the experience.
Develop Cohesive Storylines Across Multiple Displays
Connect individual projection displays through recurring characters, themes, or visual motifs that unify the narrative. You’ll maintain story coherence by establishing consistent color palettes and design elements across all projectors. Create character arcs that span multiple displays, allowing protagonists to move between screens logically. Use timeline software like After Effects or Cinema 4D to pre-visualize story flow and ensure narrative beats align with projection zones. Document story progression in detailed storyboards that specify which projector displays each narrative element, preventing plot inconsistencies during complex multi-display sequences.
Conclusion
Your creative journey with multiple projections opens doors to unlimited artistic possibilities. These seven techniques transform ordinary spaces into extraordinary experiences that captivate and engage your audience on deeper levels.
The key to success lies in thoughtful planning and understanding how each projection method serves your creative vision. Whether you’re building immersive environments or crafting sequential narratives your technical choices should always support your artistic goals.
Start experimenting with these multi-projection approaches and you’ll discover that the combination of creativity and technology creates magic that single projectors simply can’t achieve. Your audiences will thank you for the unforgettable visual experiences you’ll create.
Frequently Asked Questions
What are the main benefits of using multiple projectors instead of a single projector?
Multiple projectors enable immersive 360-degree environments, wraparound visuals, and layered depth effects that single projectors cannot achieve. They allow for larger display areas, interactive installations, and creative storytelling through sequential activation. Multi-projection setups also provide greater flexibility in covering irregular surfaces and architectural elements while creating more engaging audience experiences.
How do you create seamless visuals when projectors overlap?
Use professional calibration systems and specialized software to blend overlapping projection edges. Strategic positioning is crucial – maintain consistent distances and angles between projectors. Advanced blending techniques involve adjusting brightness levels, color correction, and edge feathering to eliminate visible seams. Professional media servers help manage timing and synchronization across multiple units.
What software is recommended for interactive multi-projection systems?
TouchDesigner and Max/MSP are leading platforms for creating responsive multi-projection content. These systems integrate motion sensors and touch-responsive surfaces to generate real-time visual feedback. Professional media servers also manage complex sequences and ensure proper synchronization. The choice depends on project complexity, interactivity requirements, and integration with existing hardware systems.
How do you ensure color consistency across multiple projectors?
Color consistency requires systematic calibration using professional color meters and calibration software. Match brightness levels, color temperature, and gamma settings across all units. Regular maintenance and lamp hour tracking prevent color drift. Consider using projectors from the same manufacturer and model series to minimize initial color variations.
What is sequential projection storytelling?
Sequential projection storytelling transforms multiple projectors into chapters of an unfolding narrative. Projectors activate in sequence using motion sensors and lighting cues to guide audience flow through the experience. This technique creates natural pathways and smooth scene transitions while maintaining story coherence through recurring themes and visual motifs across displays.
Can you mix different types of projectors in one installation?
Yes, combining different projection technologies creates unique visual effects. Mix LCD projectors with LED and laser units for contrast variations. Integrate short-throw projectors for audience interaction areas with long-throw units for expansive visuals. Experiment with various resolutions and aspect ratios, ensuring each projector’s specifications match its intended viewing distance and content complexity.
What hardware is needed for large-scale video wall synchronization?
Large-scale video walls require professional media servers, distribution amplifiers, and synchronization hardware. Network-based control systems manage timing, color accuracy, and content distribution across multiple projectors. Edge blending processors ensure seamless visual continuity. Invest in redundant systems and backup power solutions for critical installations to prevent technical failures.
How do you project onto irregular surfaces and curved walls?
Use specialized mapping software to create precise surface meshes that match irregular geometries. Advanced calibration systems ensure pixel-perfect registration on curved surfaces. Professional-grade projectors with lens shift capabilities provide positioning flexibility. Test projections thoroughly and adjust mapping coordinates to accommodate surface variations and viewing angles for optimal results.