6 Best Labeling Techniques for Accessible Spaces
Why it matters: You can’t navigate spaces effectively when critical information remains invisible to touch. Tactile and braille labeling transforms everyday environments into accessible spaces where everyone can independently identify locations, objects, and important details.
The big picture: From simple adhesive dots to sophisticated braille overlays, these six proven techniques turn any home, office, or public space into a fully navigable environment. You’ll discover practical methods that range from DIY solutions you can implement today to professional-grade systems that meet ADA compliance standards.
Disclosure: As an Amazon Associate, this site earns from qualifying purchases. Thank you!
Clear Adhesive Braille Labels for Smooth Surfaces
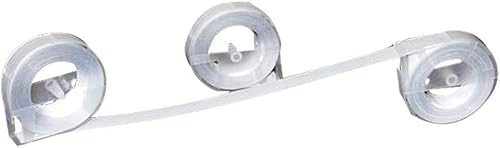
Create Braille labels quickly and easily with this handheld label maker. It embosses Braille letters and numbers on 3/8" or 1/2" labeling tape and features a Braille and print dial for simple operation.

Clear adhesive braille labels provide an excellent solution for maintaining the aesthetic appeal of surfaces while ensuring accessibility. These transparent labels blend seamlessly with existing designs and offer durability for long-term use.
P.S. check out Udemy’s GIS, Mapping & Remote Sensing courses on sale here…
Benefits of Transparent Braille Tape
Create clear Braille labels with this transparent tape, perfect for use with Braille Superstore labelers and writing slates. The tape allows you to add Braille without obscuring existing print.
Transparent braille tape maintains the original appearance of surfaces while providing tactile accessibility. You’ll preserve the visual design of glass doors, metal panels, and glossy surfaces without compromising functionality. The clear material resists yellowing and maintains clarity over time, ensuring your labels remain virtually invisible to sighted users. These labels also resist moisture and temperature changes, making them suitable for various indoor environments. You can apply them to curved surfaces and they’ll conform to the shape while maintaining proper braille dot height.
Best Applications for Glass and Metal Surfaces
Glass doors and windows benefit most from clear braille labels, particularly in office buildings and public spaces. You’ll find these labels work exceptionally well on elevator panels, metal directory boards, and stainless steel appliances. Conference room doors, bathroom signs, and display cases are ideal candidates for transparent labeling. Metal filing cabinets, control panels, and equipment housing also accommodate these labels effectively. The smooth, non-porous nature of glass and metal surfaces ensures optimal adhesion and prevents air bubbles from forming underneath the labels.
Installation Tips for Long-Lasting Adhesion
Clean the surface thoroughly with isopropyl alcohol before applying any braille label to ensure maximum adhesion. You’ll need to remove all dust, fingerprints, and residue that could interfere with the adhesive bond. Apply the label at room temperature and press firmly from the center outward to eliminate air bubbles. Use a smoothing tool or credit card to ensure complete contact with the surface. Allow 24 hours for the adhesive to fully cure before exposing the label to moisture or extreme temperatures for optimal longevity.
This 99% Isopropyl Alcohol is ideal for technical and cleaning applications. Use with proper protection and ventilation, as it's not intended for skin use.

Raised Dot Stickers for Quick Identification
Easily identify everyday items with these tactile bump dots. This 165-piece set includes various shapes and high-contrast colors, providing a simple and effective solution for the visually impaired.

Raised dot stickers offer an immediate tactile solution that doesn’t require braille literacy. You’ll find these simple yet effective markers transform everyday navigation challenges into manageable tasks.
Different Dot Patterns and Their Meanings
Single dots typically indicate “on” positions or primary functions on appliances and controls. Double dots mark “off” positions or secondary options while triple dots designate emergency or important functions. You can establish patterns like horizontal lines for temperature controls and vertical arrangements for volume settings. Standard practice includes using larger dots for high-priority items and smaller ones for detailed functions. Create consistency by documenting your chosen patterns and sharing them with household members.
Strategic Placement on Household Items
Kitchen appliances benefit from dots on frequently used settings like microwave power levels and oven temperature dials. You’ll want to mark washing machine cycles, dryer heat settings, and dishwasher program buttons for daily efficiency. Thermostat controls, light switches, and remote control buttons become instantly identifiable with strategic dot placement. Position dots on the upper-left corner of flat surfaces or directly adjacent to round controls. Focus on items you use multiple times daily for maximum impact.
Creating Custom Tactile Systems
Design your system around your specific needs and household routines. You can combine different textures like raised dots, ridged strips, and smooth patches for complex identification schemes. Color-coding with textured dots helps family members learn the system while maintaining tactile functionality. Document your custom patterns in both braille and large print for reference. Test your system for several days before finalizing placement to ensure it meets your navigation needs effectively.
Features to Look for in Braille Embossers
Create clear Braille labels with this embosser. It works with both .37 and .50 inch labeling tape for versatile use.

Desktop embossers should produce clear, consistent dot height and spacing that meets braille standards. You’ll need models with paper-handling capabilities that accommodate various label sizes and cardstock weights. Look for embossers with computer connectivity options for digital file integration and batch processing. Variable dot pressure settings allow customization for different paper types and durability requirements. Choose units with reliable feed mechanisms that prevent paper jams during long printing sessions for consistent output quality.
Cost-Effective Options for Home Use
Manual braille writers like the Perkins Brailler provide reliable label creation without ongoing costs. You can purchase pre-made braille alphabet strips and cut individual letters for basic labeling needs. Smartphone apps with braille translation features paired with embossing tape offer modern convenience. Community resources like libraries and disability service centers often provide free braille labeling services. Consider sharing embosser costs with other visually impaired individuals in your area for expensive equipment purchases.
Maintenance and Paper Selection Tips
Clean embosser pins regularly with compressed air to prevent dot distortion and ensure consistent output quality. You’ll achieve best results using heavyweight cardstock (110-140 gsm) designed specifically for braille production. Store braille paper in dry conditions to prevent moisture absorption that affects embossing quality. Replace worn embosser parts according to manufacturer schedules to maintain proper dot formation. Test different paper brands to find options that balance durability with tactile clarity for your specific applications.
Textured Fabric Labels for Clothing Organization
Textured fabric labels transform your wardrobe into an organized system that you can navigate independently through touch alone.
Heat-Transfer Braille Labels for Garments
Heat-transfer braille labels bond permanently to fabric without compromising garment integrity. You’ll apply these labels using a standard iron or heat press at 300-350°F for 15-20 seconds. They work exceptionally well on cotton, polyester, and blended fabrics while maintaining flexibility through washing cycles. Position labels inside collar areas or side seams where they won’t interfere with wearing comfort but remain easily accessible for identification.
Sew-On Options for Permanent Identification
Sew-on braille labels offer the most durable attachment method for long-term clothing organization. You’ll find these labels in cotton, nylon, and polyester materials that match your garment’s care requirements. Machine-stitch around all edges using matching thread color, or hand-sew with small running stitches for delicate fabrics. These labels withstand repeated washing and dry cleaning while maintaining their tactile clarity for years of reliable use.
Color Coordination with Tactile Elements
Color coordination combines visual and tactile cues to create comprehensive clothing identification systems. You’ll use different textured materials like velcro dots, fabric paint, or embossed patches to represent specific colors or clothing categories. Smooth textures might indicate light colors while rough textures represent dark shades. This dual-system approach benefits both visually impaired users and family members who assist with laundry organization and garment selection.
Magnetic Braille Labels for Metal Appliances
Magnetic braille labels offer a flexible solution for metal surfaces where permanent adhesive options aren’t suitable. You’ll find these specialized labels particularly useful on appliances that require frequent cleaning or repositioning of identification markers.
Kitchen Appliance Labeling Strategies
Position magnetic braille labels on refrigerator compartments to identify freezer zones and temperature-controlled drawers. You’ll achieve better organization by placing labels on microwave power level buttons and dishwasher cycle controls. Strategic placement on oven knobs and stovetop burner controls ensures safe operation while maintaining the appliance’s original appearance. These labels withstand kitchen heat and moisture while providing reliable tactile feedback.
Office Equipment and Filing Systems
Transform metal filing cabinets with magnetic braille labels that identify drawer contents and organizational systems. You can easily relocate labels when restructuring your filing system without leaving adhesive residue. Place labels on printer control panels and copy machine settings to navigate office equipment independently. Metal desk organizers and supply cabinets become more accessible with removable braille identification that adapts to changing storage needs.
Removable Solutions for Temporary Needs
Choose magnetic braille labels for rental properties or shared spaces where permanent modifications aren’t permitted. You’ll appreciate their versatility when labeling hotel room appliances or temporary workstations during travel. These labels work effectively on elevator control panels in buildings where you need temporary identification. Remove and reposition labels easily when your accessibility needs change or when moving between different metal surfaces.
3D Printed Custom Tactile Markers
Easily identify items with this 55-pack of tactile bump dots. The self-adhesive silicone markers provide a durable, reusable solution for enhancing accessibility on everyday objects.

You can create highly customized tactile markers that perfectly match your specific accessibility needs through 3D printing technology. This approach allows for unlimited design possibilities and precise dimensional control.
Design Software for Creating Braille Models
Tinkercad offers the easiest entry point for creating braille models with its drag-and-drop interface and built-in braille text generators. Fusion 360 provides professional-grade precision for complex designs, allowing you to create custom shapes with exact dot spacing measurements. OpenSCAD excels at parametric braille design, letting you generate entire label sets with consistent formatting. You’ll need to ensure proper dot dimensions – standard braille dots measure 1.44mm in diameter with 0.9mm height for optimal tactile recognition.
Material Options and Durability Considerations
PLA filament works well for indoor applications and provides smooth tactile surfaces, though it may warp in high temperatures. PETG offers superior durability and chemical resistance, making it ideal for kitchen and bathroom labels that require frequent cleaning. TPU flexible filament creates soft-touch markers perfect for clothing tags and delicate surfaces. You’ll achieve best results with 0.2mm layer heights and 100% infill for solid tactile feedback. Consider UV-resistant materials for outdoor applications.
Advanced Techniques for Complex Labeling Needs
Multi-material printing lets you combine different textures and hardnesses within single labels, creating unique identification systems through varied tactile properties. Embedded magnets during printing enable removable markers for metal surfaces without post-processing assembly. Variable height printing allows you to create graduated tactile scales for measuring tools and controls. You can integrate color-changing filaments that respond to temperature, providing visual feedback for sighted users while maintaining tactile functionality for visually impaired individuals.
Conclusion
These six tactile and braille labeling techniques offer you practical ways to create more accessible environments whether you’re working with a tight budget or seeking professional-grade solutions. You can start small with raised dot stickers and gradually expand to more sophisticated options like 3D printed markers or magnetic systems.
The key is choosing methods that match your specific needs and environment. Temporary solutions work perfectly for rentals while permanent installations suit long-term accessibility goals. You’ll find that combining multiple techniques often yields the best results.
Remember that accessibility improvements benefit everyone – not just those with visual impairments. By implementing these labeling strategies you’re creating spaces that are safer more organized and easier to navigate for all users.
Frequently Asked Questions
What are tactile and braille labels used for?
Tactile and braille labels are used to make environments accessible for people with visual impairments. They provide critical information through touch, helping individuals navigate homes, offices, and public spaces independently. These labels can identify everything from elevator buttons to kitchen appliances, creating a more inclusive environment for everyone.
Are clear adhesive braille labels durable?
Yes, clear adhesive braille labels are highly durable and designed to withstand regular use. They maintain their adhesion over time and resist wear from frequent touching. These transparent labels blend seamlessly with existing surfaces while providing long-lasting tactile identification, making them ideal for glass doors, elevator panels, and directory boards.
Do I need to know braille to use raised dot stickers?
No, you don’t need braille literacy to use raised dot stickers effectively. These simple tactile markers use intuitive patterns like single dots for “on” positions and double dots for “off” positions. They provide quick identification through touch and can be strategically placed on household items like appliances and light switches.
Can I create my own custom tactile labeling system?
Absolutely! You can create custom tactile systems using various textures, materials, and color-coding methods. This personalized approach allows you to tailor the system to your specific needs and preferences. You can incorporate different materials like fabric, plastic, or metal to create unique identification patterns that work best for your environment.
What should I look for in a braille embosser?
When selecting a braille embosser, look for clear dot production quality, reliable paper-handling capabilities, and compatibility with your computer system. Consider factors like printing speed, paper size options, and maintenance requirements. For home use, manual braille writers and smartphone apps can provide cost-effective alternatives to traditional embossers.
How do textured fabric labels help with clothing organization?
Textured fabric labels allow individuals to organize their wardrobes independently through touch recognition. These labels can be heat-transferred or sewn onto garments to provide permanent identification without compromising fabric integrity. Different textures can represent colors or clothing categories, helping both visually impaired users and their families with laundry sorting and garment selection.
What are the advantages of magnetic braille labels?
Magnetic braille labels offer flexibility and easy repositioning on metal surfaces without leaving adhesive residue. They’re perfect for frequently cleaned appliances like refrigerators and microwaves, and can be easily relocated as needed. This makes them ideal for rental properties, shared spaces, or temporary labeling situations where permanent adhesion isn’t desired.
Can I 3D print my own braille labels?
Yes, 3D printing allows you to create highly customized tactile markers tailored to your specific needs. Using design software like Tinkercad or Fusion 360, you can create unique identification systems with proper dot dimensions for optimal tactile recognition. Materials like PLA, PETG, and TPU filaments offer different durability and flexibility options for various applications.