7 Best Terrain Shading Techniques for Digital Maps
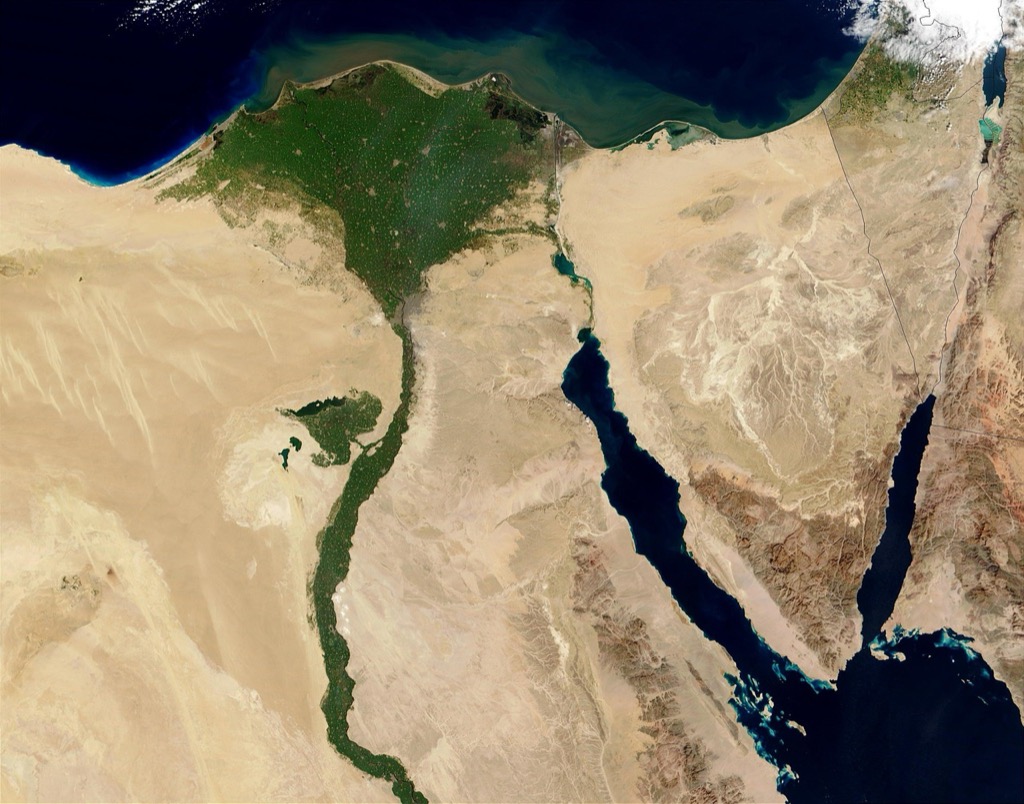
Why it matters: Terrain shading transforms flat digital maps into visually stunning representations that reveal Earth’s topography in ways raw elevation data simply can’t match.
The big picture: From hillshading to analytical relief techniques you’ve got multiple options for bringing your geographic visualizations to life — but each method produces dramatically different results depending on your specific needs and audience.
What’s ahead: We’ll break down seven proven terrain shading techniques comparing their strengths weaknesses and ideal use cases so you can choose the right approach for your next mapping project.
Disclosure: As an Amazon Associate, this site earns from qualifying purchases. Thank you!
P.S. check out Udemy’s GIS, Mapping & Remote Sensing courses on sale here…
Digital Painting Terrain Shading: Traditional Brush Techniques
Digital painting approaches bring artistic flexibility to terrain shading while maintaining cartographic precision. These manual techniques offer complete control over light placement and shadow intensity.
Soft Brush Blending Methods
Achieve smooth, healthy hair with the Diane Boar Bristle Brush. Designed for fine to medium hair, it distributes natural oils for shine and features a durable wood base with secure bristles.

Soft brush techniques create smooth elevation transitions through gradual opacity changes and color blending. You’ll achieve natural-looking terrain shadows by using brushes with 0% hardness settings in Photoshop or similar opacity controls in GIMP. Start with base terrain colors then build shadow layers using 15-30% opacity brushes. Blend ridgelines and valley floors with circular motions to avoid harsh transitions. This method works exceptionally well for mountainous regions where subtle elevation changes require careful attention to maintain realistic depth perception.
Hard Brush Detail Work
Hard brush applications define sharp geological features like cliff faces, rock outcrops, and steep canyon walls with precise edge control. Set your brush hardness to 80-100% when painting distinct terrain boundaries or rocky formations. Use smaller brush sizes (2-8 pixels) for detailed work on escarpments and larger brushes (15-25 pixels) for major ridge systems. Layer multiple hard brush strokes at varying opacities to build texture depth. This technique proves essential when mapping areas with dramatic elevation changes or geological formations requiring crisp definition.
Layer Opacity Adjustments
Layer opacity controls fine-tune terrain shading intensity without compromising underlying topographic detail. Create separate layers for highlights, mid-tones, and shadows then adjust each layer’s opacity between 20-70% based on terrain complexity. Use multiply blend modes for shadow layers and overlay modes for highlight work. Stack multiple low-opacity layers rather than single high-opacity applications to maintain color depth and avoid overexposed areas. This approach allows you to balance artistic interpretation with data accuracy requirements.
Cell Shading for Terrain: Creating Bold Cartoon-Style Landscapes
Cell shading transforms traditional terrain visualization by eliminating gradual transitions in favor of distinct color zones. This technique creates stylized landscapes perfect for thematic maps, educational materials, and artistic cartographic presentations.
Flat Color Base Application
Base colors establish your terrain’s fundamental elevation zones without gradients or subtle transitions. You’ll define discrete elevation bands using solid colors that represent different altitudinal ranges. Start by analyzing your DEM data to identify natural elevation breaks, then assign distinct hues to each zone. Software like QGIS or ArcGIS Pro allows you to create classified symbology with hard breaks between elevation categories. Apply these flat colors uniformly across each elevation band, ensuring clean boundaries between adjacent zones for maximum visual impact.
Sharp Shadow Edge Definition
Shadow edges create dramatic contrast by eliminating soft transitions between illuminated and shadowed terrain areas. You’ll calculate hillshade values and apply threshold settings to convert gradual shadow gradients into hard-edged boundaries. Use binary classification to separate light and dark areas, typically setting shadow cutoff values around 127 on a 0-255 scale. Tools like Photoshop’s threshold adjustment or QGIS’s raster calculator help convert smooth hillshade data into sharp-edged shadows. Position light sources at consistent angles to maintain uniform shadow direction across your terrain model.
Limited Color Palette Usage
Color palettes restrict your terrain representation to 4-8 carefully selected hues that maintain visual hierarchy. You’ll choose colors that progress logically through elevation zones while avoiding intermediate tones that would compromise the cell-shaded aesthetic. Select base colors for lowlands, mid-elevations, and highlands, then add accent colors for water bodies and urban areas. Use color theory principles to ensure adequate contrast between adjacent elevation bands. Digital color palette tools like Adobe Color or Coolors help you develop harmonious color schemes that work effectively across different output formats and printing conditions.
Gradient Mapping Terrain Shading: Automated Color Transitions
Gradient mapping automates terrain color transitions by analyzing elevation data and applying predetermined color schemes across your topographic surface. This technique eliminates manual color placement while maintaining consistent visual hierarchies throughout your mapping project.
Luminosity-Based Color Assignment
Luminosity-based assignment maps elevation values directly to brightness levels in your chosen color gradient. You’ll configure software like ArcGIS Pro or QGIS to read DEM pixel values and automatically assign colors based on their relative position within your elevation range. Higher elevations receive lighter tones while valleys get darker colors, creating intuitive topographic representation. This method works exceptionally well for monochromatic gradients where elevation correlation remains visually obvious to map readers.
Custom Gradient Creation
Custom gradients let you define specific color breakpoints at precise elevation intervals rather than relying on linear interpolation. You’ll establish color stops at critical elevations like sea level, treeline, or snow caps to emphasize meaningful topographic zones. Adobe Photoshop and Geographic Information Systems support multi-point gradient creation with full control over color transitions between stops. Design gradients with 5-8 color stops to balance visual interest with readability, ensuring smooth transitions between adjacent elevation bands.
Blend Mode Optimization
Blend modes control how gradient colors interact with underlying hillshade or relief data in your terrain visualization. You’ll typically use Multiply mode for darker, more dramatic shadows or Overlay mode for balanced color retention with enhanced topographic detail. Screen blending works effectively for lighter color schemes where you want to preserve subtle elevation changes. Test different opacity settings between 60-85% to maintain color vibrancy while allowing underlying terrain texture to show through your gradient application.
Ambient Occlusion Terrain Rendering: Realistic Shadow Depth
Ambient occlusion terrain rendering creates depth perception by simulating how ambient light reaches different surface areas. This technique calculates shadow accumulation in terrain crevices and valleys, producing realistic depth cues that enhance three-dimensional visualization.
Cavity Map Generation
Cavity maps identify terrain depressions by analyzing surface curvature and proximity relationships between elevation points. You’ll calculate how deeply recessed each pixel is relative to its neighbors using convolution filters that measure local surface deviation. Modern GIS software like ArcGIS Pro and QGIS provide cavity detection algorithms that generate grayscale maps where darker values represent deeper recesses. These maps serve as the foundation for ambient occlusion calculations, highlighting areas where ambient light naturally diminishes due to geometric obstruction.
Achieve a flawless, even complexion with e.l.f. Flawless Satin Foundation. This lightweight, vegan formula provides medium coverage and a semi-matte finish for all-day wear, while hydrating your skin with glycerin.

Screen Space Techniques
Screen space ambient occlusion (SSAO) processes terrain data in real-time by sampling neighboring pixels within a defined radius around each point. You’ll implement this technique using graphics processing units (GPUs) that calculate shadow intensity based on depth buffer information rather than complex geometric calculations. Popular mapping engines like Cesium and Mapbox GL JS utilize SSAO algorithms to enhance terrain visualization without significant performance penalties. The technique works by comparing depth values across screen pixels, darkening areas where surrounding terrain blocks ambient light penetration.
Ray Tracing Applications
Ray tracing ambient occlusion traces light rays from each terrain point to calculate precise shadow accumulation based on actual geometric obstruction. You’ll configure ray sampling patterns that cast multiple rays upward from each surface point, counting how many encounter terrain obstacles before reaching the sky dome. Professional rendering software like Blender and specialized terrain tools such as World Machine implement Monte Carlo ray tracing methods for photorealistic ambient occlusion effects. This approach produces the most accurate results but requires significant computational resources, making it ideal for high-quality static visualizations rather than interactive applications.
Normal Map Terrain Shading: Surface Detail Enhancement
Normal mapping adds micro-detail complexity to terrain surfaces without increasing geometric resolution. You’ll achieve photorealistic surface textures by manipulating light calculations through specialized height-to-normal conversion workflows.
Height Map Conversion
Height map conversion transforms elevation data into RGB normal vectors that define surface orientation. You’ll process grayscale height information using gradient calculations to determine slope direction and magnitude. Tools like GIMP’s Normal Map plugin or Photoshop’s 3D filters convert height data by analyzing pixel intensity differences between adjacent areas. The conversion process calculates X and Y gradients from height differentials, then combines them with Z-axis information to create three-channel normal maps. Proper scaling during conversion prevents overly dramatic surface details that can overwhelm your terrain’s primary topographic features.
Lighting Calculation Methods
Lighting calculation methods for normal-mapped terrain combine surface normals with directional light vectors to determine pixel illumination. You’ll use dot product calculations between normal vectors and light direction to compute diffuse lighting intensity. Advanced techniques include Blinn-Phong shading for specular highlights on water surfaces and Lambert shading for realistic rock formations. Real-time applications benefit from vertex shader implementations that process normal map data efficiently. Multiple light sources require separate calculations that blend together using additive or multiplicative methods, creating complex lighting scenarios that enhance terrain realism.
Texture Coordinate Mapping
Texture coordinate mapping ensures normal map details align correctly with terrain geometry through UV coordinate systems. You’ll establish consistent scaling relationships between world space distances and texture pixel dimensions to prevent stretching artifacts. Planar projection works well for cliff faces while cylindrical mapping suits rolling hills and valleys. Advanced workflows use multiple UV channels to blend different detail scales across terrain zones. Proper coordinate mapping prevents normal map distortion that occurs when texture resolution doesn’t match geometric detail density, maintaining surface authenticity across varying terrain complexity.
Procedural Noise Terrain Shading: Algorithm-Based Texturing
Procedural noise terrain shading generates realistic surface textures through mathematical algorithms rather than pre-made images. This technique creates infinite variation while maintaining consistent quality across large geographic areas.
Perlin Noise Implementation
Perlin noise implementation creates smooth, natural-looking terrain textures by interpolating random gradient vectors at regular grid points. You’ll find this algorithm particularly effective for generating base terrain patterns that mimic organic surface variations. The technique produces coherent noise values between 0 and 1, which you can then map to grayscale values for hillshade generation. Most GIS software packages like QGIS and ArcGIS Pro include Perlin noise functions in their raster calculator tools for direct terrain application.
Fractal Brownian Motion
Fractal Brownian Motion combines multiple noise frequencies to simulate complex geological processes that create realistic terrain surface detail. You can achieve this by summing several octaves of Perlin noise at different scales and amplitudes. The technique mimics how natural erosion and deposition create patterns at multiple scales simultaneously. Start with larger wavelengths for major terrain features, then add progressively smaller frequencies for fine surface detail that enhances visual realism without overwhelming the base topography.
Multi-Octave Layering
Multi-octave layering controls terrain detail density by blending noise functions at different frequency levels with specific amplitude ratios. You’ll typically use 4-8 octaves for optimal results, with each successive octave having half the amplitude and double the frequency of the previous layer. This approach creates terrain shading that maintains large-scale coherence while adding fine surface texture. Adjust the persistence value between 0.3 and 0.7 to control how much each octave contributes to the final result.
Hand-Painted Terrain Shading: Artistic Manual Techniques
Hand-painted terrain shading combines traditional artistic methods with cartographic precision to create visually compelling topographic representations. This approach allows for complete creative control over lighting conditions, color relationships, and atmospheric effects.
Reference Photo Analysis
Studying actual landscape photography forms the foundation of realistic hand-painted terrain shading. You’ll need to examine how natural light interacts with different geological formations, noting shadow patterns on ridgelines, valley floors, and cliff faces. Professional terrain artists maintain extensive photo libraries organized by terrain type, lighting conditions, and seasonal variations. Digital tools like Adobe Bridge or Lightroom help catalog reference images by elevation zones, rock types, and atmospheric conditions. Focus on analyzing three key elements: directional lighting consistency, color temperature shifts across elevation gradients, and shadow density variations in different terrain features.
Color Temperature Variation
Implementing strategic color temperature shifts enhances the three-dimensional perception of terrain features. You’ll achieve this by applying cooler blues and purples to shadowed areas while using warmer yellows and oranges for illuminated surfaces. Professional cartographers typically use a 2000-3000K temperature difference between highlight and shadow areas to maintain visual coherence. Digital painting software like Photoshop or Procreate provides color temperature adjustment layers that preserve underlying detail while shifting warmth values. Consider atmospheric effects when selecting temperature ranges – higher elevations naturally appear cooler due to increased atmospheric scattering, while lower valleys retain warmer tones from reflected ground light.
Atmospheric Perspective Application
Atmospheric perspective creates depth by progressively reducing contrast and saturation with distance from the viewer. You’ll implement this technique by gradually shifting distant terrain features toward cooler, lighter tones while maintaining strong contrast in foreground elements. Professional terrain artists typically reduce saturation by 15-20% for mid-ground features and 40-50% for background elements. Layer opacity controls in digital painting applications allow precise atmospheric effect adjustments without permanently altering base terrain colors. Mountain ranges demonstrate this principle most effectively – foreground peaks maintain full color intensity while distant ridges appear increasingly pale and blue-shifted through atmospheric haze.
Conclusion
You now have seven powerful terrain shading techniques at your disposal each offering unique advantages for different mapping scenarios. From the artistic flexibility of digital painting to the technical precision of normal mapping your choice depends on your project’s specific requirements and target audience.
Consider your available resources time constraints and desired visual outcome when selecting your approach. Procedural noise works excellently for large-scale projects while hand-painted techniques shine in specialized cartographic work requiring artistic nuance.
Remember that combining multiple techniques often yields the most compelling results. Don’t hesitate to experiment with different methods to discover what works best for your terrain visualization needs.
Frequently Asked Questions
What is terrain shading and why is it important for digital maps?
Terrain shading is a visualization technique that enhances digital maps by providing visually appealing representations of Earth’s topography beyond basic elevation data. It creates three-dimensional depth perception on flat surfaces, making geographical features more intuitive and easier to understand for viewers while improving the overall aesthetic quality of cartographic presentations.
What are the main terrain shading techniques discussed in the article?
The article covers seven key terrain shading techniques: digital painting methods, cell shading, gradient mapping, ambient occlusion rendering, normal map shading, procedural noise generation, and hand-painted artistic approaches. Each technique offers unique advantages for different mapping applications and target audiences.
How does hillshading work in terrain visualization?
Hillshading simulates the effects of sunlight on terrain surfaces by calculating shadow patterns based on elevation data and light direction. This analytical relief method creates realistic depth perception by highlighting ridges and darkening valleys, making topographic features more visually prominent and easier to interpret.
What is cell shading and when should it be used?
Cell shading transforms traditional terrain visualization by using distinct color zones instead of gradual transitions. It’s ideal for thematic maps and educational materials where clear elevation distinctions are needed. This technique uses flat color bases, sharp shadow edges, and limited color palettes to maintain visual hierarchy.
How does gradient mapping automate terrain shading?
Gradient mapping analyzes elevation data and applies predetermined color schemes automatically, ensuring consistent visual hierarchies across large areas. It uses luminosity-based color assignment where elevation values map to brightness levels, creating intuitive representations with custom color breakpoints at critical elevations for enhanced readability.
What is ambient occlusion in terrain rendering?
Ambient occlusion simulates how ambient light reaches different surface areas to create realistic shadow depth. It identifies terrain depressions through cavity map generation and uses techniques like screen space ambient occlusion (SSAO) and ray tracing to calculate precise shadow accumulation, producing photorealistic terrain visualizations.
How do normal maps enhance terrain detail?
Normal maps enhance surface detail without increasing geometric resolution by converting elevation data into RGB normal vectors that define surface orientation. Combined with lighting calculations and proper texture coordinate mapping, they create realistic illumination effects while maintaining surface authenticity across varying terrain complexity.
What is procedural noise terrain shading?
Procedural noise terrain shading generates realistic surface textures through mathematical algorithms like Perlin noise and fractal Brownian motion. This technique allows for infinite variation while maintaining consistent quality across large areas, using multi-octave layering to control detail density and enhance visual realism.
How does hand-painted terrain shading differ from automated methods?
Hand-painted terrain shading combines traditional artistic methods with cartographic precision, emphasizing reference photo analysis and natural light interaction with geological formations. It uses strategic color temperature variations and atmospheric perspective to create depth, offering more nuanced and artistic control over the final visualization.
Which terrain shading technique should I choose for my project?
The choice depends on your specific requirements: use cell shading for educational materials, gradient mapping for consistent large-area visualization, ambient occlusion for photorealistic effects, normal mapping for detailed surface representation, procedural noise for natural textures, or hand-painted methods for artistic control and unique aesthetic appeal.